

Is your pedal’s indicator light too bright? Spare your eyes with these 5 ways to decrease the brightness of your guitar pedal’s LEDs! In this article, we go over various ways – from the least invasive to the most invasive – to dim your pedal’s LED.

As a member of the Reverb Partner Program, eBay Partner Network, and as an Amazon Associate, StompboxElectronics earns from, and is supported by, qualifying purchases.
Disclaimer: Stompbox Electronics and/or the author of this article is/are not responsible for any mishaps that occur as a result of applying this content.
Solution 1: Cover the LED with Painter’s Tape
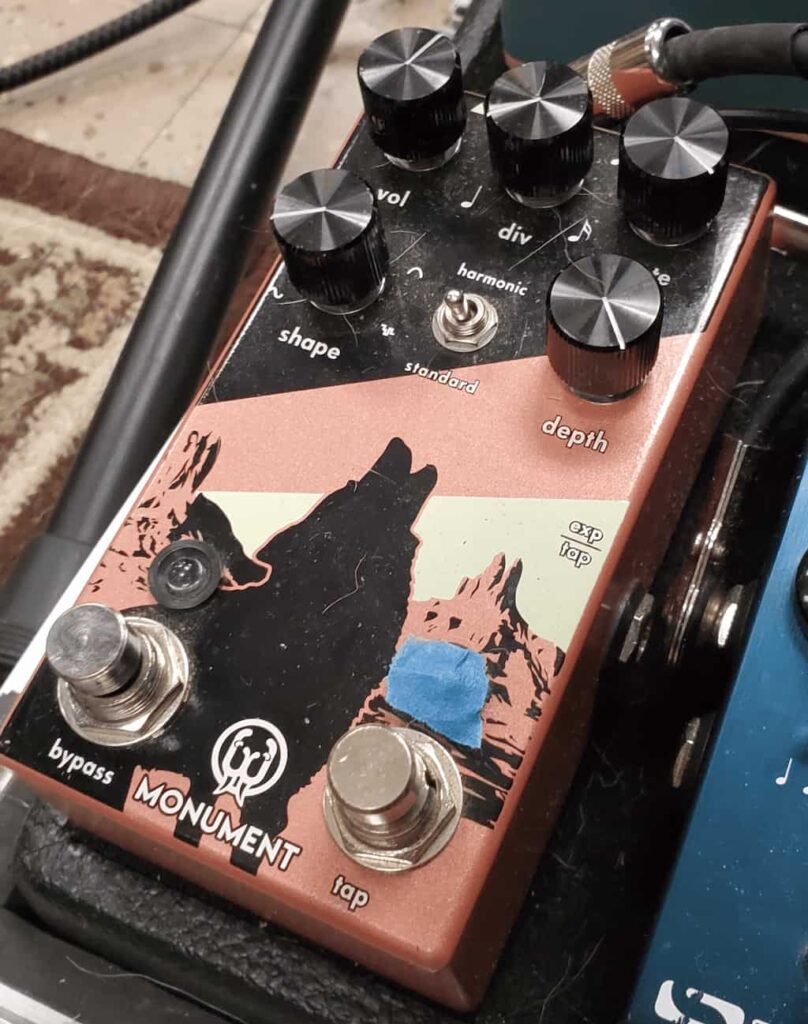
A friend of mine has a Walrus Audio Monument, which is a super smooth Harmonic Tap Tremolo. The only qualm he had with it involved a blinding tap tempo LED. I could empathize, since I shared this exact issue with my Walrus Audio Julia.
Walrus Audio (who makes awesome-sounding pedals with great artwork!) isn’t the only company that built pedals with eye-searing energy. Similar reviews have been found for select MXR pedals – particularly the Carbon Copy delay and their 10-Band EQ. Earthquaker pedals are also frequently mentioned – my Arpanoid can land planes!
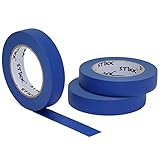
A solution that seemed to work for my friend was to use blue painter’s tape (pictured below). By covering the clear rate LED, he was able to dampen the brightness to something manageable. You could add a layer or two if your particular situation calls for it.
Solution 2: Use “Light Dims” Covers to Dim Your Guitar Pedal’s LED
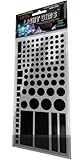
The next-to-least invasive method for dimming a bright guitar pedal LED is to use a product called “Light Dims”. They’re made for all sorts of applications – from dimming a super bright consumer electronics display to reducing the annoying glow of an alarm clock at night.
They come in circular or rectangular cut-outs on a set of sticker sheets and are available on Amazon.
Solution 3: Add Opacity Using a Sharpie and Sandpaper
The third least-invasive way for dealing with a bright guitar pedal LED is to use a method covered by Mr. Brian Wampler in the YouTube short below. Take a piece of sandpaper and lightly sand the dome of the LED. Then, coat the top of it with black Sharpie. The rough surface will help to adhere the black marker ink to the epoxy. The result is a subtle glow and increased opacity.
The sandpaper grit used in the video is P150, which can be found in sheets at Amazon.

Solution 4: Modify Your Guitar Pedal by Swapping LEDs
There are two major styles of LEDs: clear and diffused. A clear LED emits all the generated light, whereas a diffused LED spreads the light evenly. Diffused LEDs are usually tinted with a color (red, orange, yellow, blue, etc.). As you can imagine, clear LEDs are perceived as brighter while diffused LEDs have a more tamed feel to them.
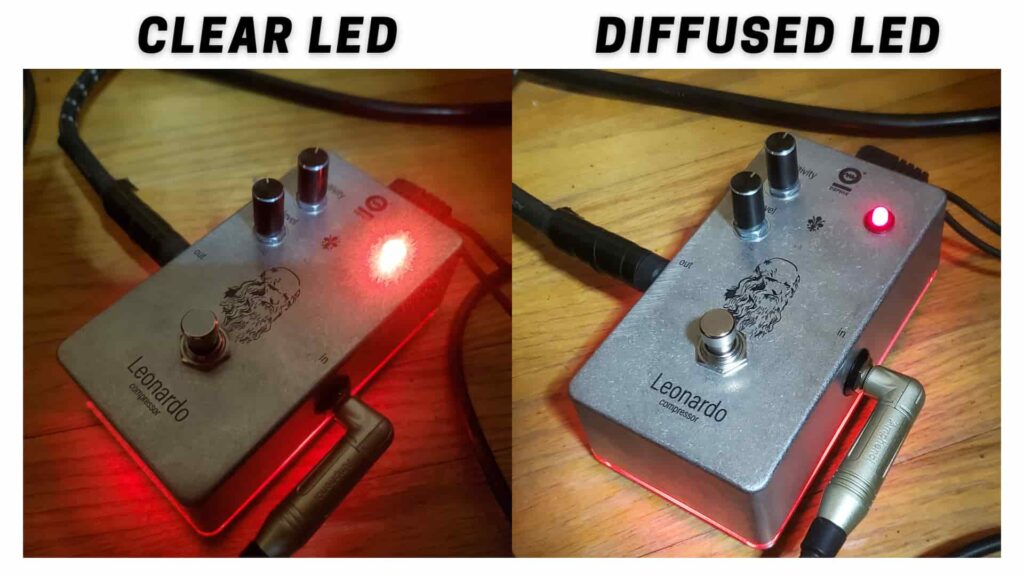
In my case, I have two pedals with clear LEDs: a Walrus Audio Julia and a Dophix Leonardo Compressor. Both of them normally use clear LEDs. One solution to reducing their brightness is to simply remove the LED and replace it with a diffused one.

If you decide to go this route, you’ll likely need a screwdriver, a soldering iron, and some desoldering braid. The StompboxElectronics Guitar Pedal LED Modification Kit comes in handy in this case.
Solution 5: Modify the Current Limiting Resistor (CLR)
There are tons of pedals out there built with a 3PDT true bypass system. That method of true bypassing usually includes an LED on one of the switch legs, turning off and on the LED based on the state of the footswitch.
Guitar pedals using this method of powering their LED usually use a resistor to limit the current flowing through it – a current limiting resistor.
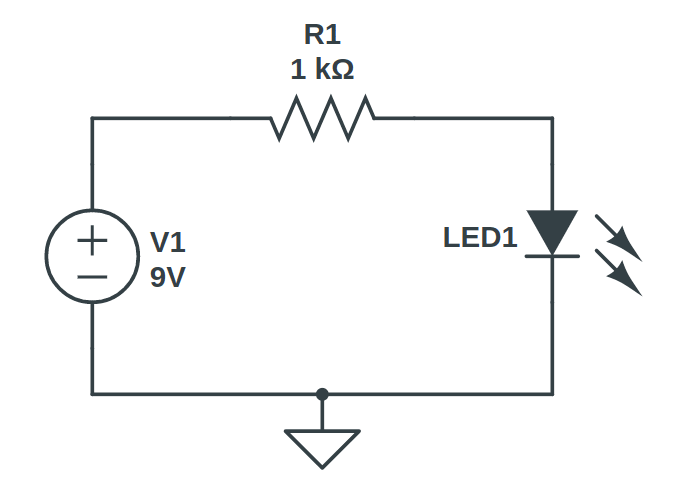
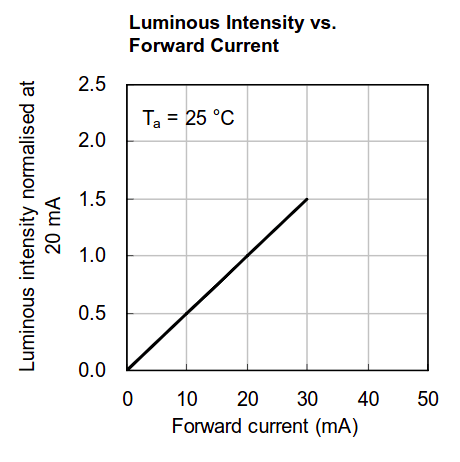
This resistor can be swapped to change the current flow thrugh the diode and therefore modify the brightness of the LED. To illustrate, below is an excerpt from an LED datasheet showing the relationship between the current flowing through the LED and its brightness (luminous intensity):
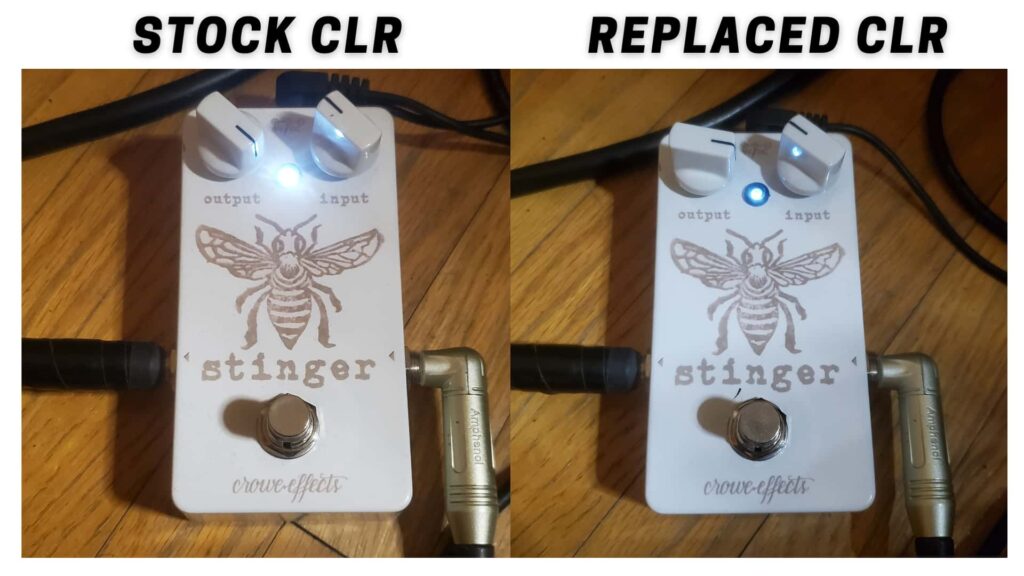
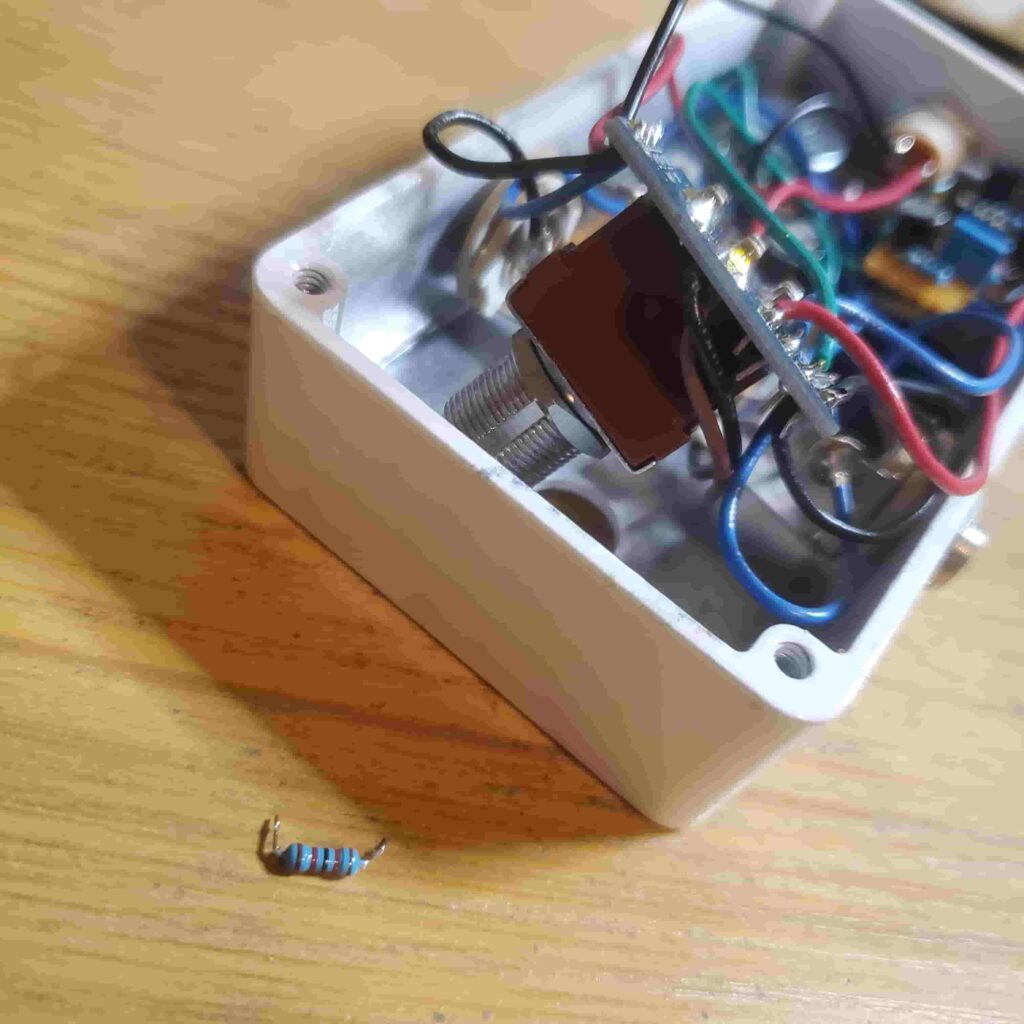
To lessen the brightness of a guitar pedal’s LED you need to increase the value of the current-limiting resistor. Here are the steps I took to modify my Crowe Effects Stinger to reduce the LED intensity:

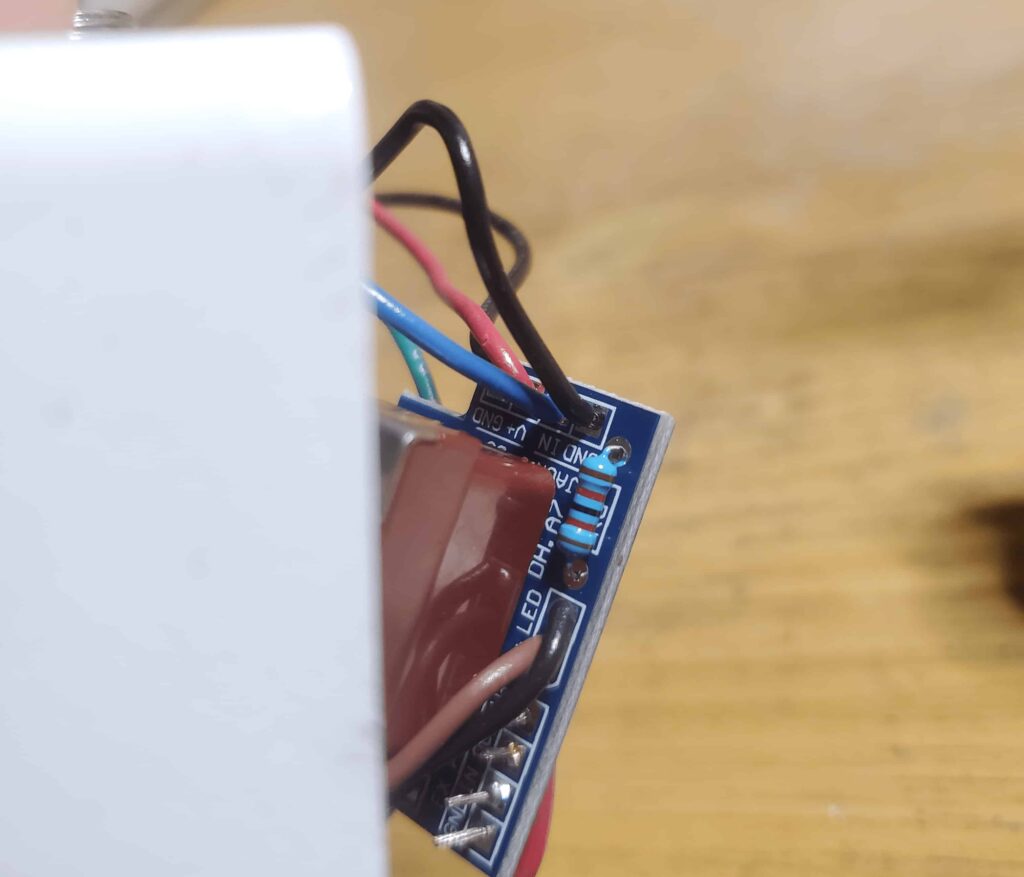
Step 1: Locate the Current-Limiting Resistor (CLR)
First, open the pedal up and locate the current-limiting resistor. You can usually find it using a schematic, but if you don’t have one its sometimes easy to find the CLR. In the Stinger, all the switching-related components are on a circuit board directly connected to the 3PDT footswitch – including the CLR. The resistance value in my case is 12k ohms.
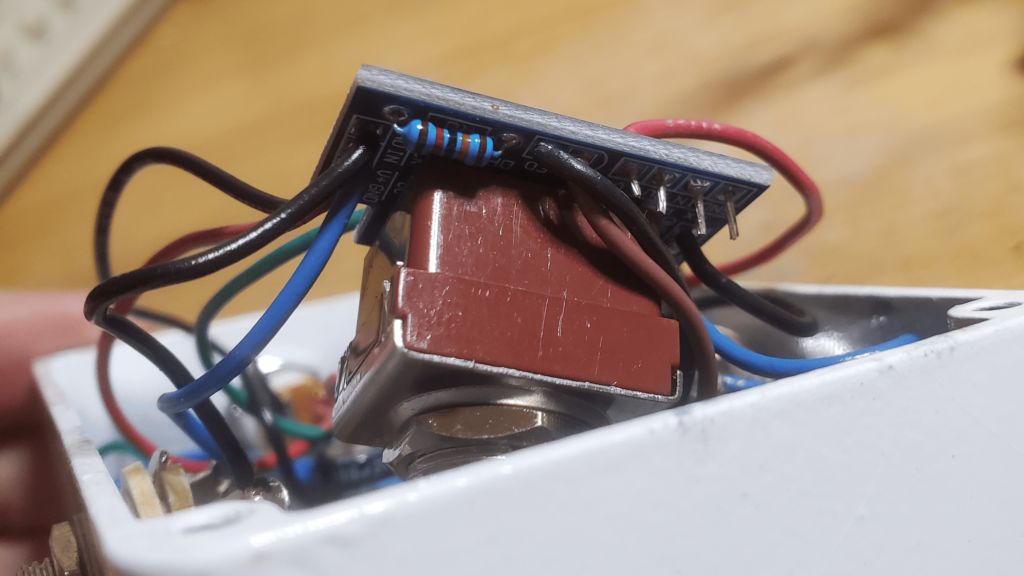
Step 2: Remove the Existing Resistor
With the help of a soldering iron and a pair of ESD tweezers you can remove the CLR from the circuit board. Usually I heat the solder from the bottom side of the board, then when I feel the solder has been heated enough I gently lift that side of the resistor so its’ lead escapes the via hole. The same goes for the other lead.
Finally, after removing the stock resistor, clear the via hole of solder using a desoldering pump.
Step 3: Install the New Resistor
In my case, through trial and error, I found out that I needed to use a resistor of at least 10 times the CLR! I ended up on a 120k ohm resistor:
Meet the Author:

Hi, I’m Dominic. By day, I’m an engineer. By night, I repair and modify guitar effects! Since 2017, I’ve been independently modifying and repairing guitar effects and audio equipment under Mimmotronics Effects in Western New York. After coming out with a series of guitar effects development boards, I decided the next step is to support that community through content on what I’ve learned through the years. Writing about electronics gives me great joy, particularly because I love seeing what others do with the knowledge they gain about guitar effects and audio circuits. Feel free to reach out using the contact form!
The Tools I Use
As a member of Amazon Associates, Stompbox Electronics earns and is supported by qualifying purchases.


