
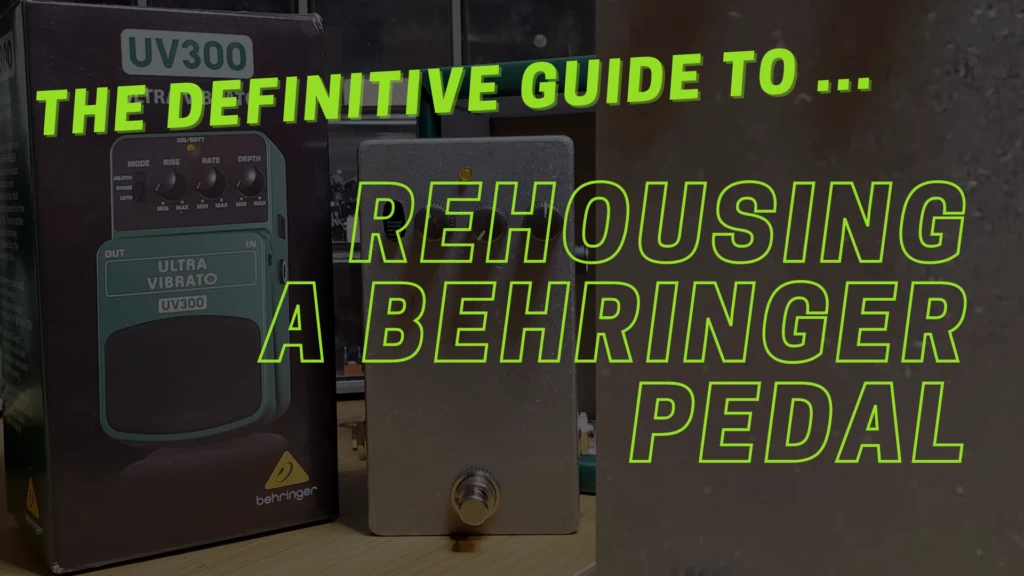
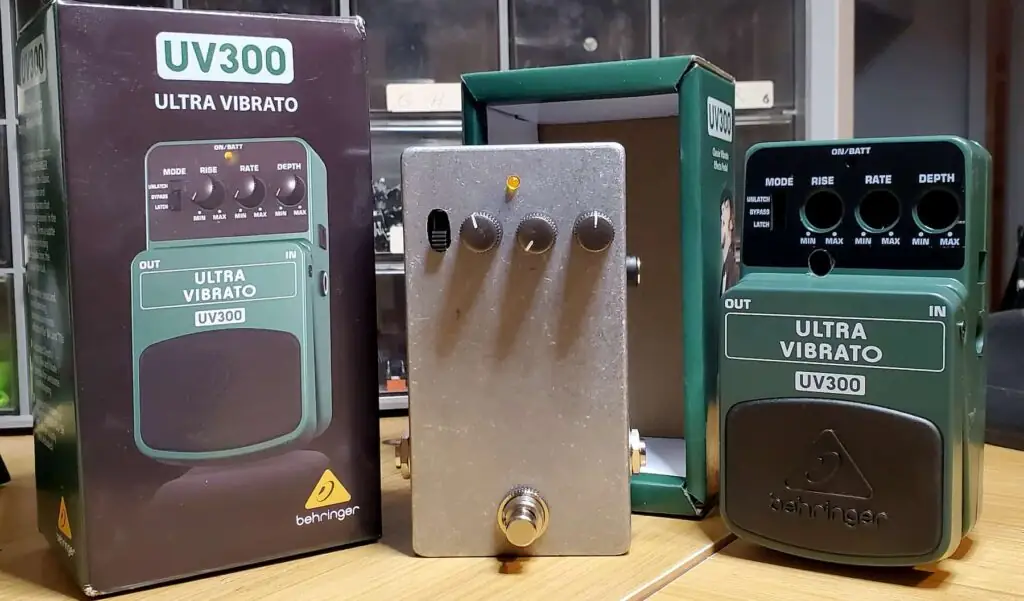
To get more sturdiness and reliability out of a Behringer pedal, you may opt to rehouse it into a more robust enclosure. The following is a guide for rehousing a Behringer pedal, using the UV300 Ultra Vibrato as an example.

As a member of the Reverb Partner Program, eBay Partner Network, and as an Amazon Associate, StompboxElectronics earns from, and is supported by, qualifying purchases.
Disclaimer: Stompbox Electronics and/or the author of this article is/are not responsible for any mishaps that occur as a result of applying this content.
Why Rehouse a Behringer Pedal?
Access “Inaccessible” Tones
Many Behringer pedals are based on circuits by big-name brands. In fact, they are notorious for being almost straight clones of BOSS compact pedals (like the SF300 vs. the BOSS FZ-2). A few allegedly take on old Line 6 ToneCore designs, like the Echo Park vs. the EM600.
Now, some of these products have since disappeared from the market and have increased in collector value. For example, a quick search for the BOSS VB-2 on Reverb reveals used models going for no less than $500. Even the Waza version is over $200. On the flipside, the Behringer UV300 is based on the VB-2 and costs no more than $40 bucks!
It’s a similar story with the FZ-2 and SF300. Buying Behringer allows you to play the closest thing to these out-of-reach pedals without having to front half a grand (in the case of the VB-2, at least).
Replace Cheap Components
One thing about Behringer pedals: they’re cheap. As such, the housings are usually plastic and relatively fragile compared to other big-brand counterparts. Rehousing from a plastic enclosure to an aluminum enclosure allows your pedal to last longer under harsher conditions.
Additionally, in Behringer pedals, the 1/4″ jacks are often soldered directly to the circuit board. The tug-and-pull of the jack by the cord can cause the solder to break under tension, causing “signal doesn’t pass” and “it works…but only when the cord is like this” problems. With a rehouse, these problems can be avoided.
Add Modifications
A third and subtle reason for rehousing is to add modifications that wouldn’t normally be applied to the stock pedal for one reason or another. For example, the original enclosure might not have enough room for a potentiometer, jack, or switch that a particular modification may call for. With a rehouse, you have complete control over which mods to add without having to worry too much about space requirements.
What You’ll Need for the Rehouse
An Enclosure
There’s nothing worse than starting a rehouse just to find out the box you bought won’t accomodate the pedal you’re rehousing. Luckily, you won’t have this problem! The minimum size enclosure you need in order to rehouse a Behringer pedal is a Hammond 125B or 1590N1 aluminum enclosure. Amazon and LoveMySwitches usually has some in stock.
Replacement Jacks
Next on the list are the signal and power jacks. You will want to replace the stock input and output jacks with panel mount equivalents. All jacks can be found on LoveMySwitches.
For the output jack, pay attention. If the output of your particular Behringer pedal is stereo, then you will need a TRS-style jack. The input jack can usually be replaced with a simple TS-style jack.
As for the power jack, you can’t go wrong with a Lumberg 2.1mm panel-mount.
Replacement Footswitch
We won’t be able to use the stock tactile switch to engage/disengage the rehoused pedal, so we’ll need to install a momentary footswitch. I personally like the soft-touch style normally open momentaries. You can get them from LoveMySwitches.
Tools
The following table serves as a list of tools I used to successfully complete the rehouse:
| Tool | Recommendation |
|---|---|
| Soldering Station/Iron | Weller WE1010NA WE1/WEP70/PH70 SOLDERSTAT.120V |
| Soldering Wick | Lesnow Solder Wick Braid |
| Wire Strippers | Klein Tools 11063W Wire Cutters |
| Drill Press | 10 in. Bench Mount Drill Press, 12 Speed by Central Machinery |
| Drill Bit Set | Dewalt Titanium Nitride Coated Drill Bit Set |
| Automatic Center Punch | 2 Pack Automatic Center Punch, Pamiso 5.1 Inch Spring Loaded Drill Punch Tool |
| Deburring Tool | General Tools 196 Short Length |
| Masking Tape | Scotch General Purpose Masking Tape |
| Sharpie Marker | Sharpie 30101 Fine Point Permanent Marker Black |
Rehousing Other Behringer Pedals
This guide is focused on rehousing a Behringer UV300 Ultra Vibrato. That said, you can still use the material here to rehouse other Behringer pedals since most of the models have similar controls. If you find that your Behringer pedal has particularities that make the rehousing different, feel free to contact me and share the knowledge.
Steps
1. Remove the Circuit Board
First, we need to open the Behringer pedal and remove the circuit board.
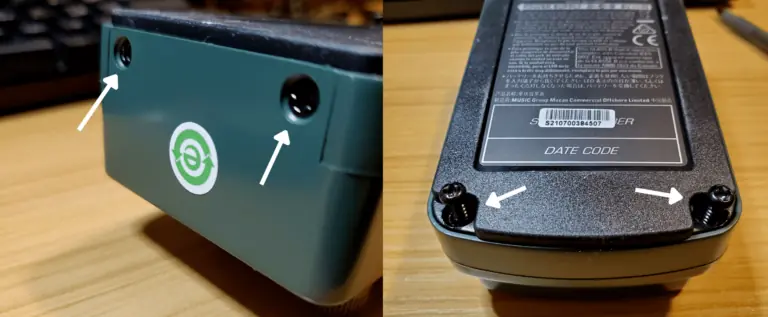
Remove the back cover by unscrewing the 4 screws holding it in. Two are located on the top, the other two are located on the bottom.
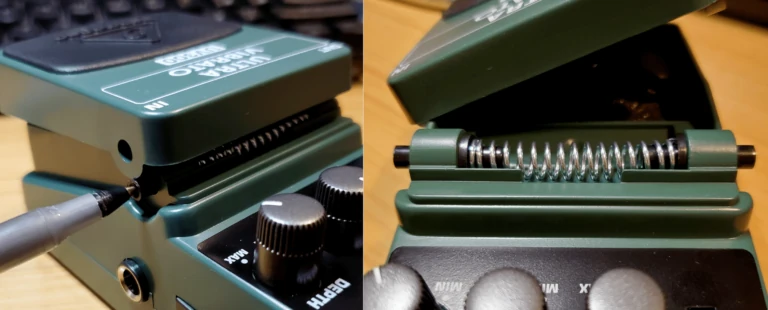
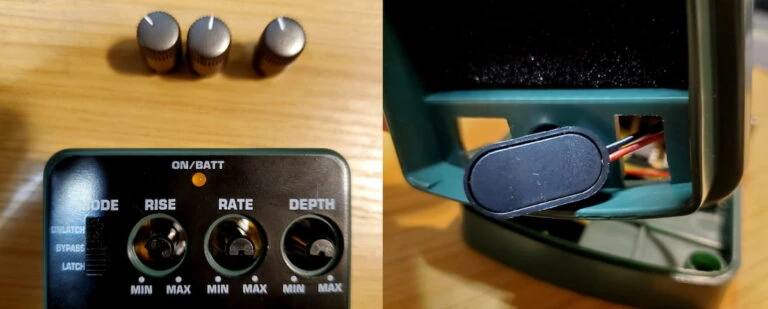
Next, remove the battery cover using a pen. Push into the black plug on either side of the pedal to release the spring. Lift it up just enough so it doesn’t click back into place. Then, use the pen on the other black plug and lift up the cover to remove it.
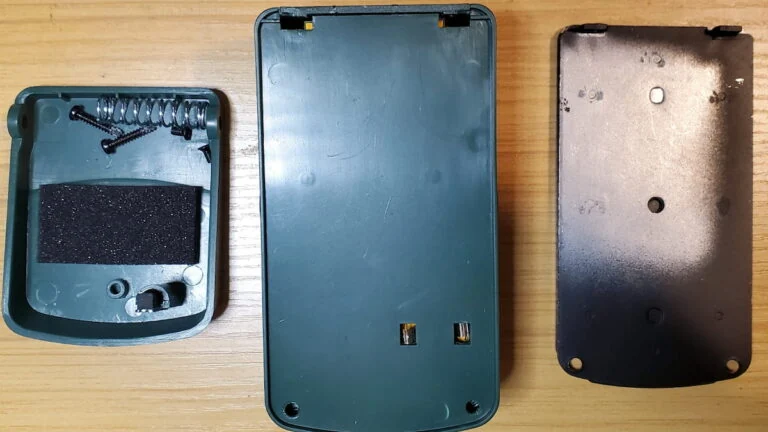
By now, you should have removed the battery cover and the back plate:
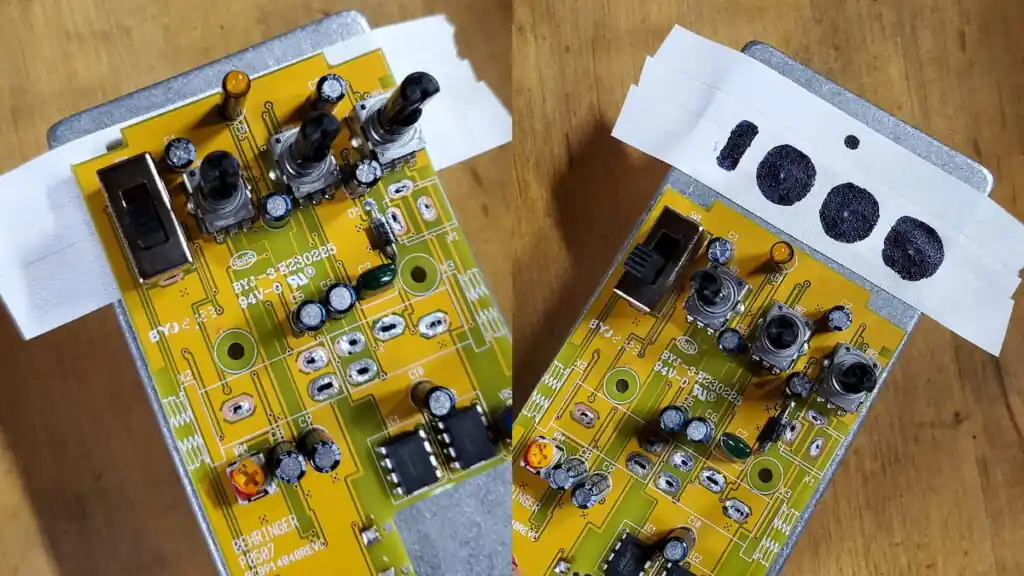
In order to remove the plastic enclosure from the plastic plate you will need to first remove the knobs on the top side of the pedal.
Most of the time you can simply pull them and they’ll eventually slide off. If they don’t cooperate, you can use two large flathead screwdrivers and loosen their grip using a rocking motion (gently, so the knobs aren’t damaged). Once they’re at a point where you can get your fingers underneath them you will be able to pull them off.
Additionally, remember to push the battery clip through the hole when removing the cover.
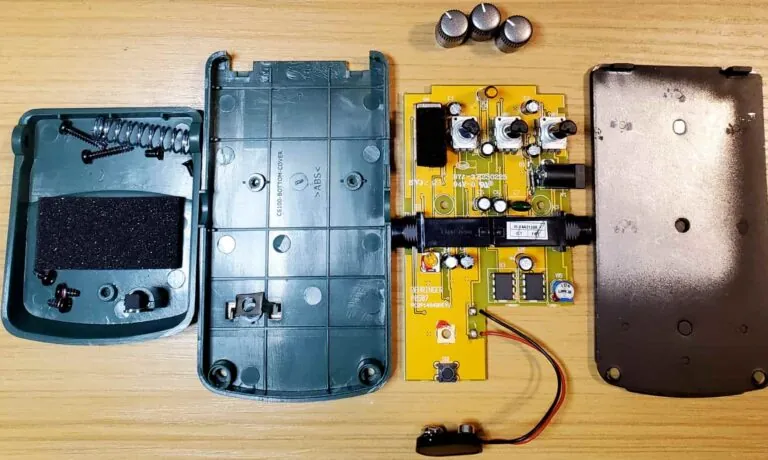
At this point you should have the following on your bench, in addition to the plastic enclosure:
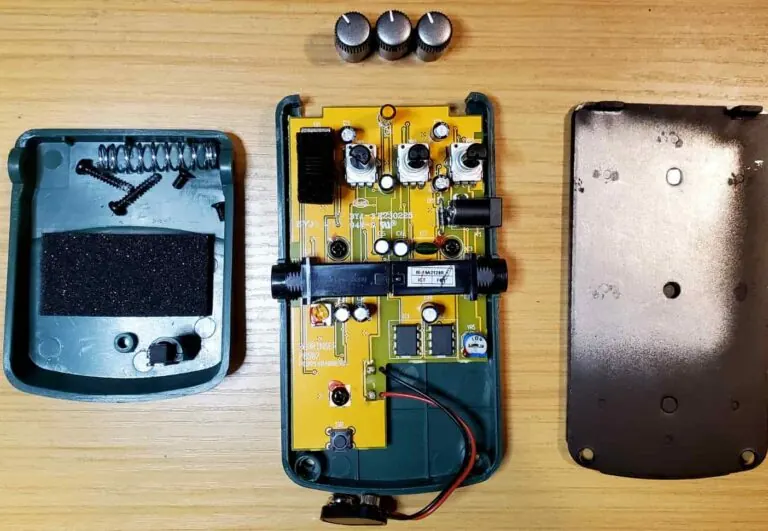
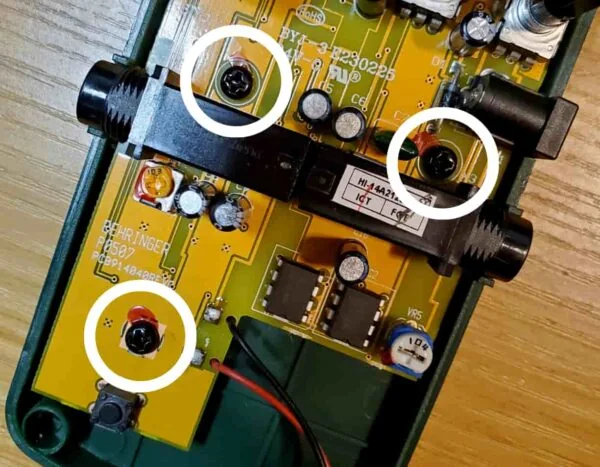
There are three black screws holding in the circuit board. Use a philips head screwdriver to unscrew them and remove the circuit board.
You have successfully removed the circuit board from the UV300.
Step 2: Remove the Stock Parts
Next, we need to remove the battery clip, the input and output jacks, and the power connector.
Removing the Battery Clip
Removing the battery clip is easy. You can snip the wires with a pair of wire cutters, or heat up the solder connections and remove it altogether.
The battery clip wires are looped through two holes by the edge of the circuit board. If you decide to desolder them, it will help to push the wires through to provide some slack. In this way you can more easily remove them while desoldering.
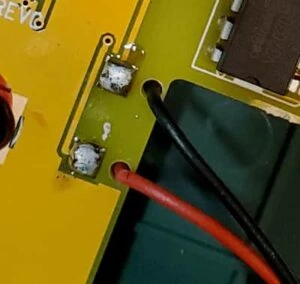
Removing the Signal & Power Jacks
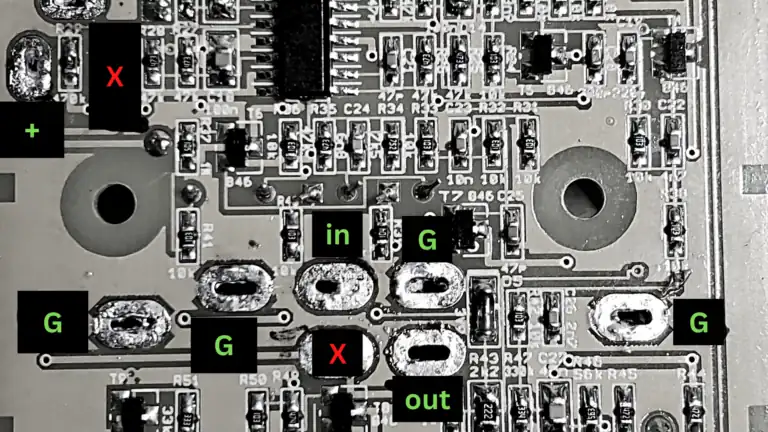
Before removing the signal jacks, it’s helpful to annotate the signal and ground connections. For me, this amounted to writing on the circuit board with a Sharpie marker.
The letter “G” stands for ground. The input signal goes to “in” and the output signal goes to “out.” For the power connections, the “+” symbol shows where the positive voltage is applied.
Old solder can be difficult to heat up evenly, so I always start by reflowing the solder on all connector pins. Reflowing is the process of heating up the solder pad and applying new solder to it. This new solder serves a couple functions: it clings to/mixes in with the old solder and allows us to more evenly apply heat to the area. So, with new solder applied, we can heat up and remove the old solder more effectively.
After reflowing each pad you can start removing the solder. There are a few tools you can use to do this: desoldering braid, solder suckers, desoldering guns, and hot air stations are among them. I use a manual solder sucker to start, then I attempt to clean up the rest using braid.
This method rarely removes all the solder from the pads, so you may need to get creative. For example, with one hand I can heat up the pad with the soldering iron and with the other hand I can push on the plastic housing using the handle of one of my tweezers, moving the component out of its position.
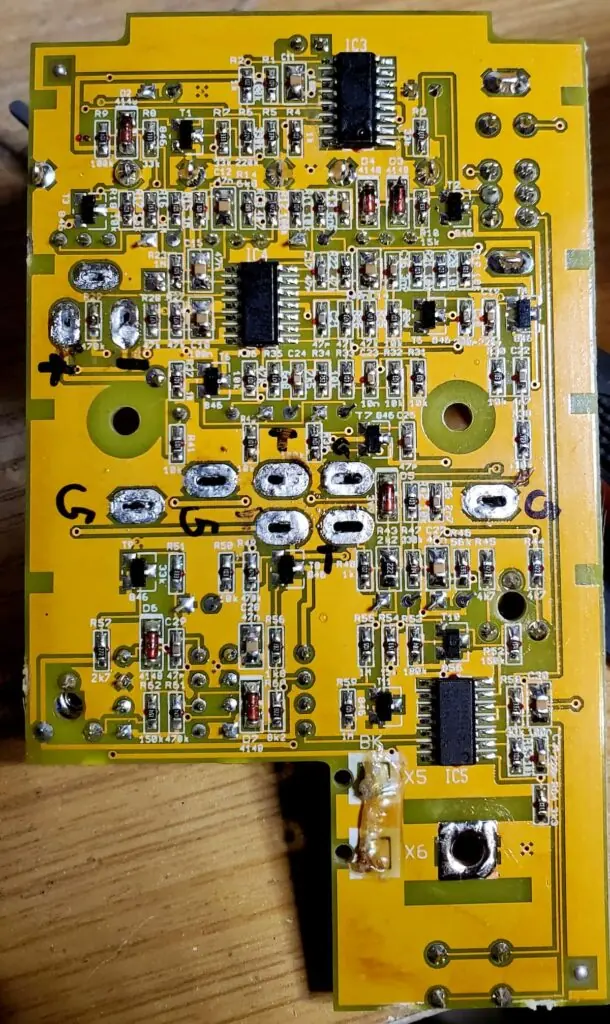
You need to be careful not to totally strip off the copper pad when pushing on the component. Tiny movements and a lot of patience go a long way here. Here is the circuit board after removing the stock components:
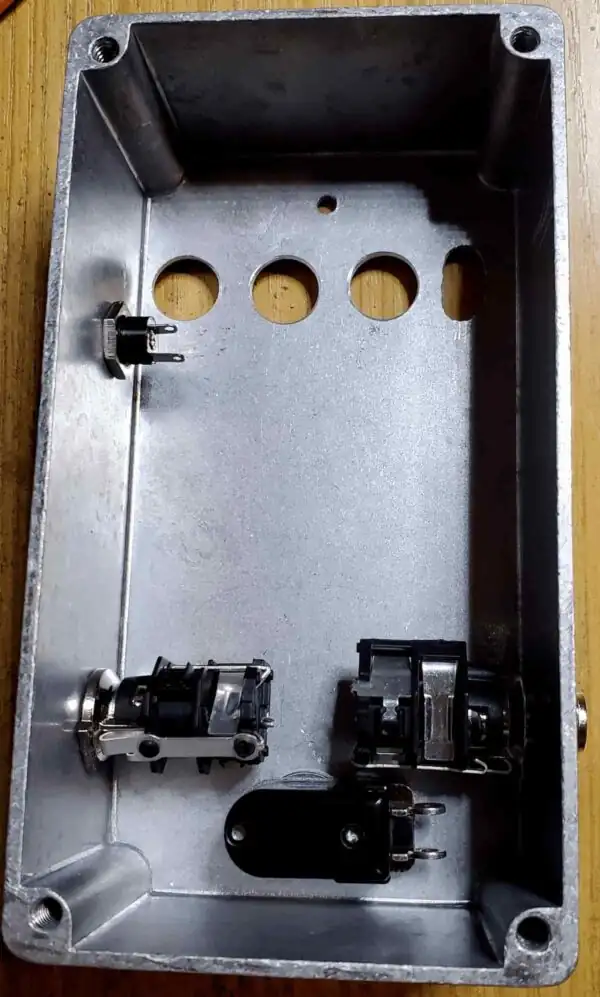
Step 3: Drill the Enclosure
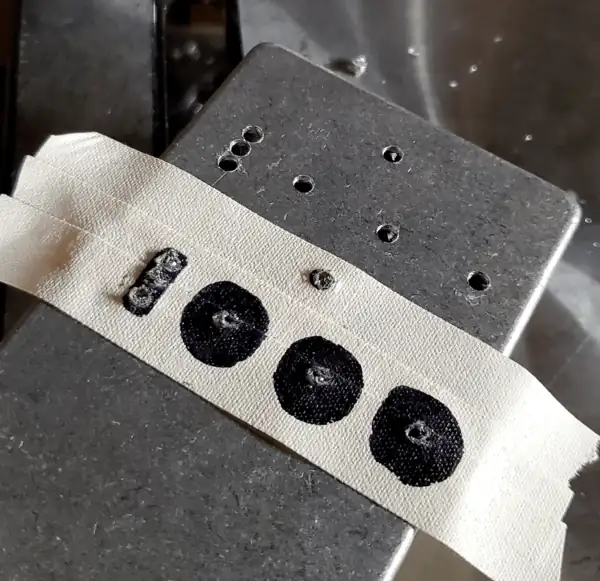
Now that the stock components are removed, we need to plan out how to drill the new enclosure. Start by taking the stock plastic enclosure and cover the area where the knobs go with masking tape. Then, take a black sharpie and mark out the hole placement as shown:
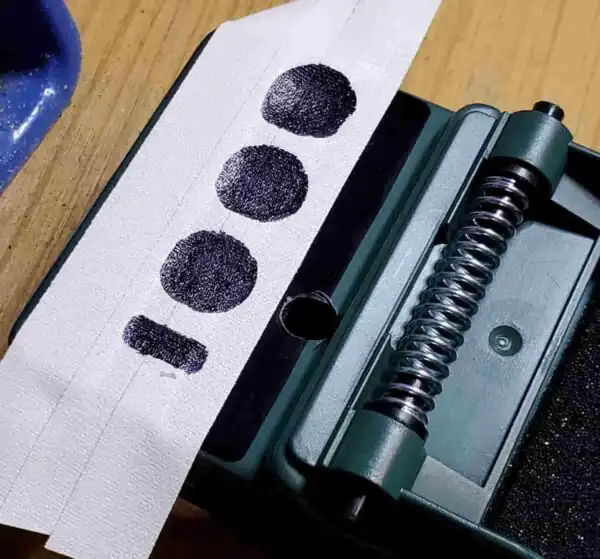
Gently lift the marked tape from the plastic enclosure and place it across the new aluminum enclosure. Make sure you leave some space (about 10mm) for the LED near the top. Then, using the automatic center punch, mark the center of each hole as a guide to use when drilling.
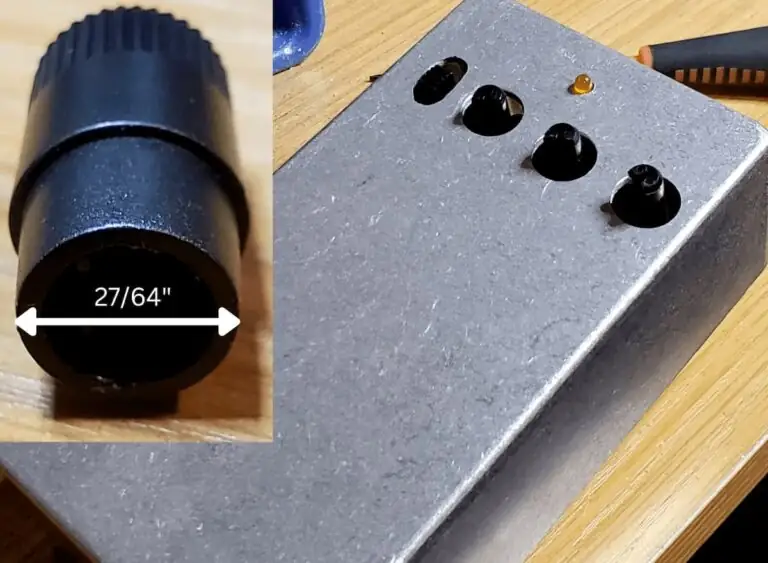
First, drill the pilot holes with a smaller drill bit size, shown below.
Then, drill your way up to the diameter of the knobs. In this case, for the UV300, the knob hole diameter ended up being 27/64″ and the width of the selector switch hole was 13/64″.
It’s important to note the knob measurement is for the bottom (smaller) diameter as shown in the image below. Your mileage may vary on other Behringer models, so do your due deligence on the component hole sizing. You will need to file the switch hole to square it up. Here’s a suggestion for a set of metal files, in case you don’t have a set.
Now that the circuit board fits with the stock knobs, you can start determining the placement of the new components. For the power connector, I placed it just above where the stock power jack would have been.
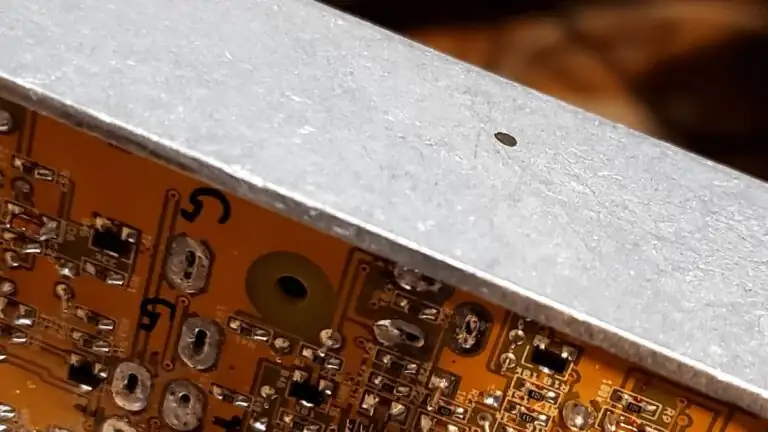
The new input and output jacks, along with the momentary footswitch, can be placed towards the bottom of the enclosure. Be careful when you’re measuring this up! Test and make sure everything fits with the circuit board in the enclosure. Once you’re convinced the parts will fit, you can continue to mark up where the holes should be placed.
Step 4: Wiring
Lastly, we need to wire up the new components. See below for a quick wiring guide for the UV300.
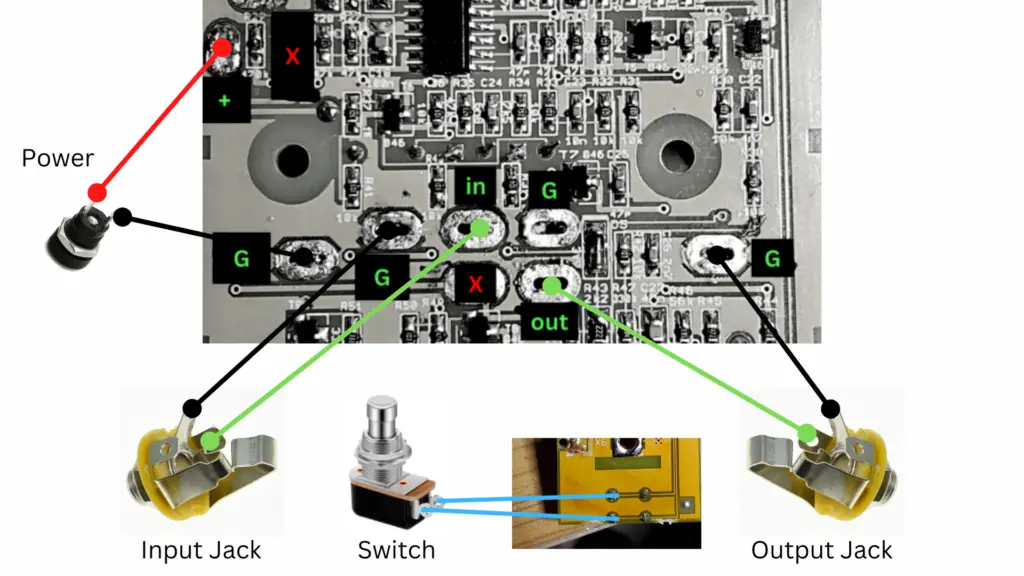
First up is the power connector. Connect the positive (sleeve) and negative (tip) lugs to the corresponding solder pads. Note that the red X’s are there because they are involved with grounding the battery. Since we aren’t using a battery in the rehouse we need to connect the ground in a place other than where the old power connector was connected.
Second, the input and output jacks. The black line indicates a ground connection, while the green line indicates the signal line. Remember, the ground is connected to the sleeve lug while the signal is connected to the tip.
Lastly, we need to solder the momentary footswitch. On the circuit board, find the tactile switch responsible for engaging and disengaging the pedal. It should have 4 pins, connected as 2 pairs. The switch should be hooked up so that one lug is connected to the top pair, while the other lug is connected to the bottom pair. Reference the blue lines in the diagram above for a visual.
Step 5: Enjoy
Once you’re finished the wiring you can box everything up and enjoy your newly rehoused Behringer pedal!
Meet the Author:

Hi, I’m Dominic. By day, I’m an engineer. By night, I repair and modify guitar effects! Since 2017, I’ve been independently modifying and repairing guitar effects and audio equipment under Mimmotronics Effects in Western New York. After coming out with a series of guitar effects development boards, I decided the next step is to support that community through content on what I’ve learned through the years. Writing about electronics gives me great joy, particularly because I love seeing what others do with the knowledge they gain about guitar effects and audio circuits. Feel free to reach out using the contact form!
The Tools I Use
As a member of Amazon Associates, Stompbox Electronics earns and is supported by qualifying purchases.


Comments are closed.