[Last Updated: January 4, 2023]
As a member of the Reverb Partner Program and as an Amazon Associate, StompboxElectronics earns from, and is supported by, qualifying purchases.
Disclaimer: Stompbox Electronics and/or the author of this article is/are not responsible for any mishaps that occur as a result of applying this content.
Reviewing the True Bypass Circuit
We introduced the True Bypass wiring scheme in Figure 1.1, shown again for your reference.
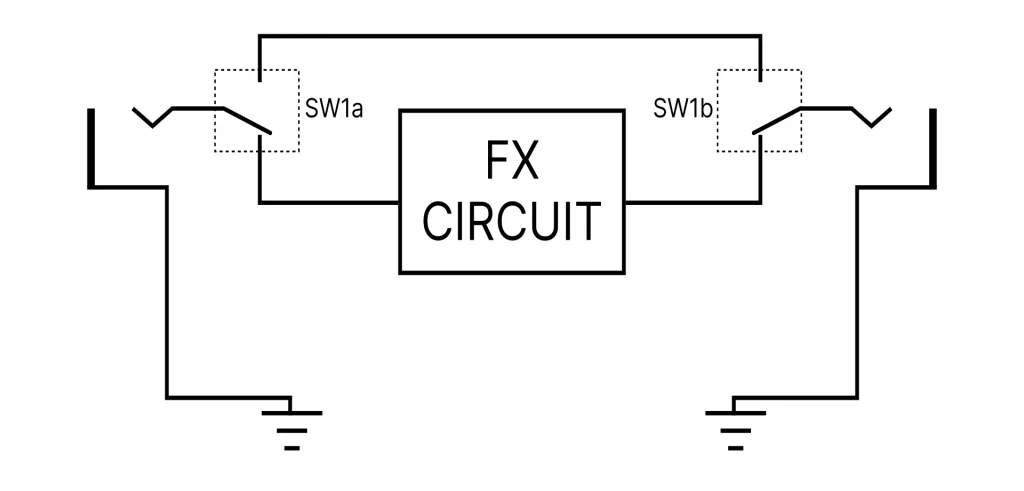
When engaged, the input signal travels into the left side of the FX CIRCUIT block through switch SW1a. The output signal travels out of the right side of the circuit, through switch SW1b, and arrives at the output.
We used a double-pole double-throw (DPDT) switch at first. However, we wanted to add an indicator light so we ended up swapping the DPDT with a 3PDT switch and used the third pole to toggle the LED on and off.
The De-Popper Circuit Explained
What is an AC signal?
Meet Rufus. Rufus built an Overdrive pedal with the True Bypass configuration. He puts it in an effects chain with 2 other pedals, shown in Figure 2.1. The first pedal is an Octave Pedal and feeds into the input of Rufus’ pedal. The output of Rufus’ pedal feeds into a Delay pedal.
What should we expect from the output of the Octave pedal?
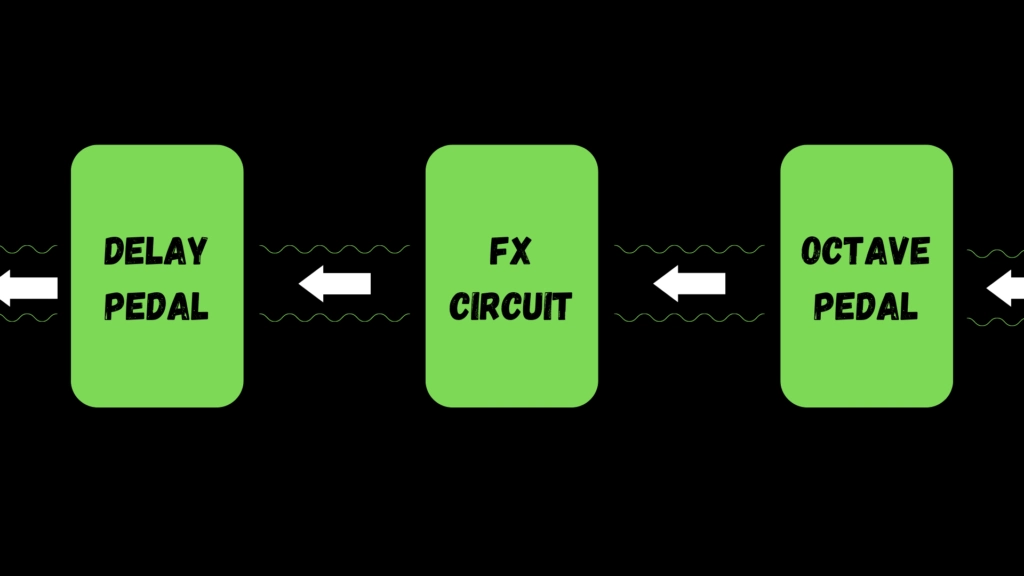
The answer shouldn’t surprise you! We expect the guitar signal with an Octave effect applied to it.
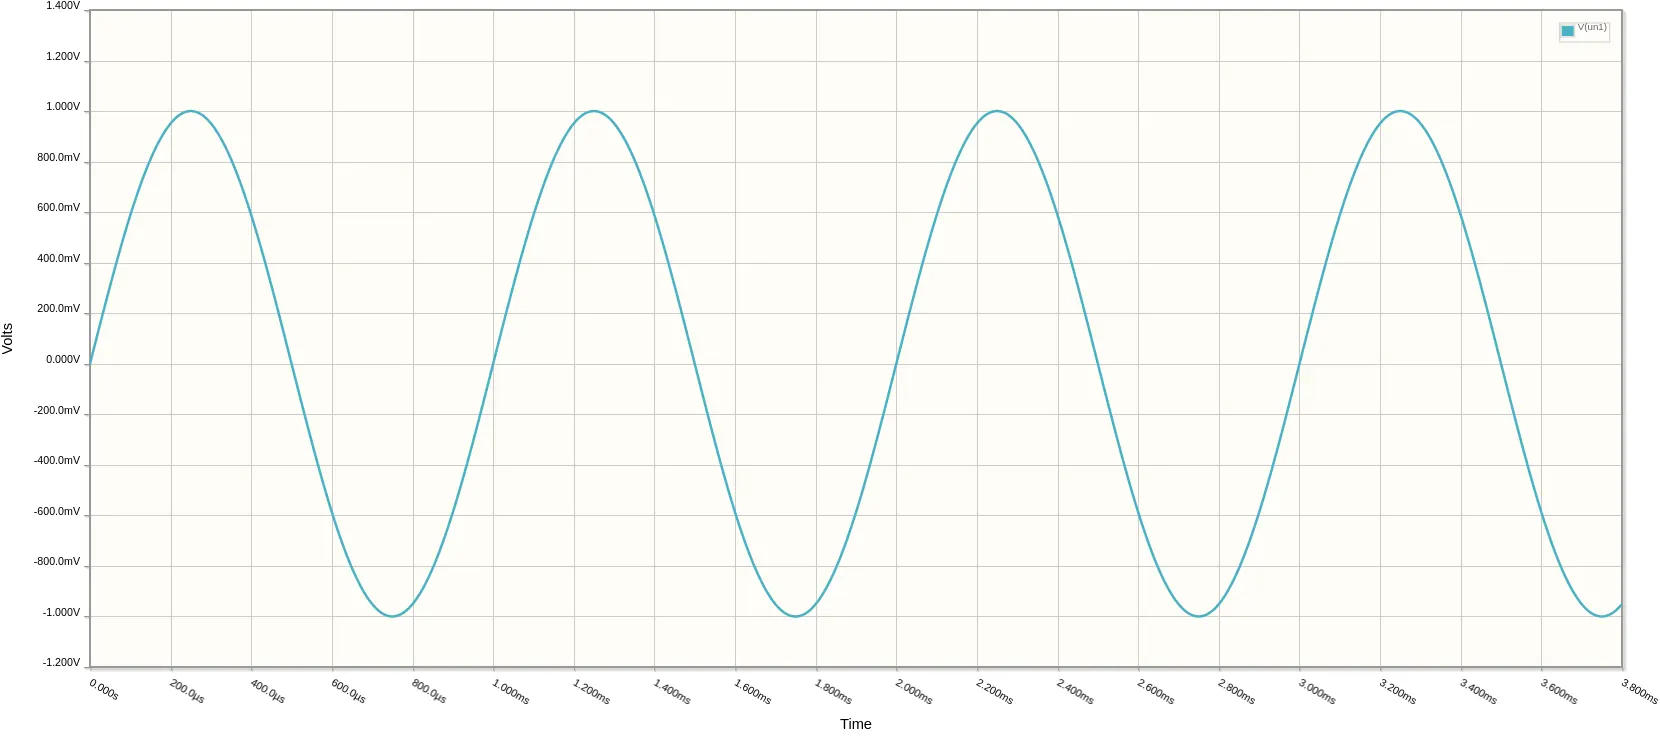
Technically, we expect a time-varying signal. Time-varying signals are characterized by voltages that vary with time. They are also commonly referred to as AC signals, and we’ll use that terminology moving forward.
For us, the AC signal is simply a guitar signal. The most popular example of an AC signal is a sine wave (Figure 2.2):
Dealing with Static Charge
Static charge is nothing more than a build-up of charge (electrons).
Occassionally, static charge builds up on the output jack of the Octave pedal. In this case, Rufus needs an electrical component that will protect his circuit from an in-rush of static charge at the input jack. Let’s employ our new friend: the Capacitor.
The Capacitor
Capacitors are electronic components built with two plates. How a capacitor operates is fairly complicated, so its explanation is reserved for another time. You only need to understand two things:
- If charge is applied to one plate of a capacitor, it cannot pass through to the other side.
- AC signals (time-varying signals) can pass through the plates of a capacitor.
Point #1 supports Rufus’ decision to use a capacitor to block static charge from entering his pedal. Point #2 allows Rufus to use the capacitor and still expect the guitar signal to reach his Overdrive circuit.
Using the Capacitor in The De-Popper Circuit
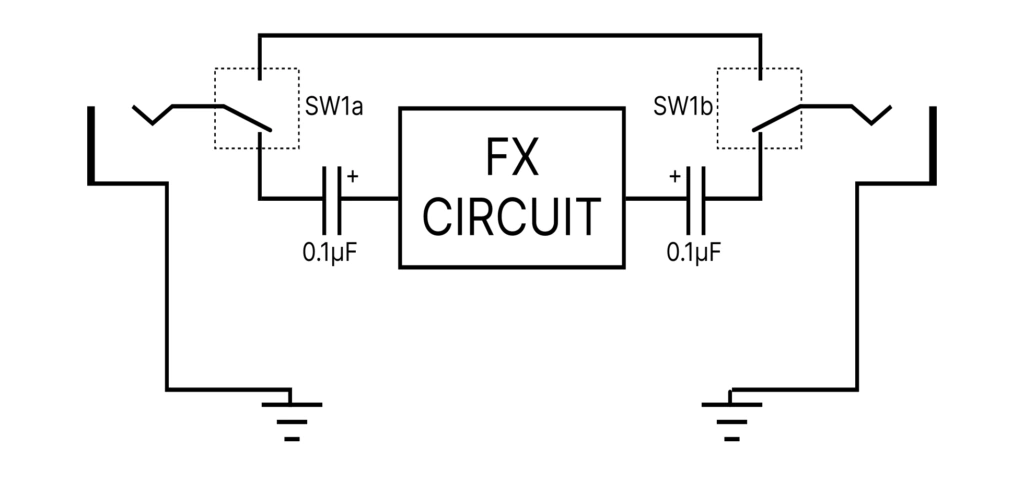
Figure 2.3 shows a capacitor on the input of the FX circuit. Point #2 above ensures that the guitar signal will pass into the effects circuit through switch SW1a.
A second capacitor was added to the output to protect our circuit from any static charge that may show up at the output jack. It also serves to block any charge from flowing out to the next pedal in the chain.
In this configuration, only the effected guitar signal passes through switch SW1b and into the output jack.
Completing the De-Popper Circuit
In the example above, if Rufus uses this circuit as-is he will notice that, once in a while, a loud POP will be heard at the output when switching between bypassed and engaged modes.
Rufus’ circuit is protected from external charge build-up, but there are also charges present within his circuit. When the pedal is bypassed, these internal charges can build up on the plates of the capacitors and cause a voltage to appear across them.
Once the pedal is switched into “engaged” mode the difference in charge across the plates quickly equalizes. This “equalization” happens extremely fast, resulting in a quick variation in voltage. An audible POP occurs at the output of the effect as a direct result of that quick voltage change.
So what does Rufus do about it? He can prevent that charge build-up by giving the electrons a path to ground through a resistor (Figure 2.4).
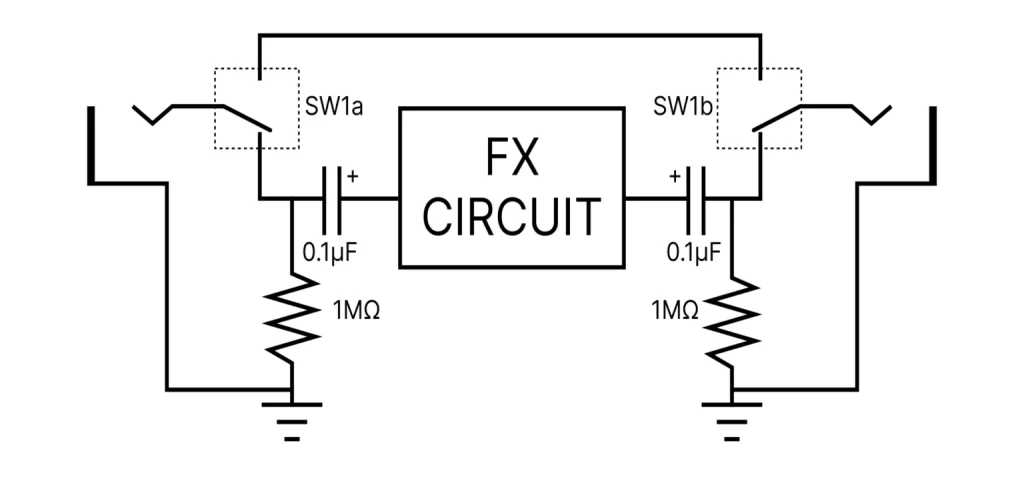
Place the first resistor between the effect input and ground. Likewise, place a second resistor between the effect output and ground.
Generally, you’ll want the input resistor to be a large value (1MΩ – 2.2MΩ). Conversely, the output resistor is typically in the low kilohms (approximately 5kΩ – 10kΩ).
These resistors act as pull-down resistors since they “pull down” the charge to ground. It also ensures that the DC voltage at the input and output of the circuit is fixed to 0V in reference to ground. Any charge built-up across the capacitors is discharged through the pull-down resistors.
De-Popper Parts List
You can build the De-Popper circuit with 3 simple parts. If you want to add the indicator LED you will need to add a current-limiting resistor and, of course, the LED.
| Parts | Qty |
|---|---|
| 3PDT Footswitch | 1 |
| 1MΩ Resistor | 2 |
| 0.1uF Capacitor | 2 |
De-Popping the PROTIS 1 Development Board
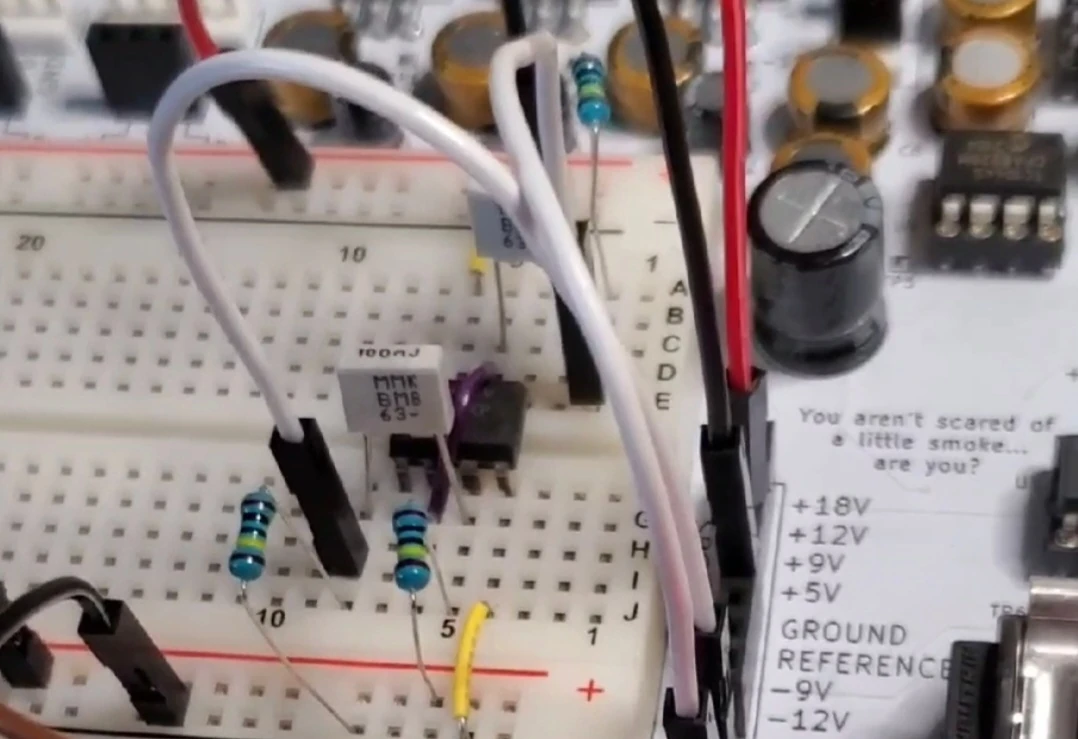
The PROTIS 1 Development Board has a True Bypass circuit embedded into it’s design. Because of differences in effects designs you will need to “de-pop” your own circuits.
Place a 1MΩ resistor across the input signal and ground. Likewise, place a 1MΩ resistor between the output signal and ground. You can then couple your breadboarded circuit to the input and output signals using capacitors, as shown in the de-popper circuit above.
Insight from Mr. Black Pedals
An article from Mr. Black Pedals details additional methods of wiring True Bypass systems, including the “grounded input wiring scheme” and the addition of “current limiting resistors.” The former allows you to remove the input resistor we added, while the addition of current limiting resistors allows us to limit the amount of current leaving or entering the circuit during switch transitions.
Have a look at the resources section below for more.
Resources
[1] Mr. Black Pedals – What really causes switch pop, October 6th, 2012
[2] Jack Orman – Why Guitar Pedals Pop, (C)2015,2017
Guitar Effects Design in 48 Circuits or Less
The 48 Circuits or Less article series serves to close the gap between DIY guitar effects design and guitarists interested in the craft by uniquely curating the most important aspects of DIY guitar effect circuit design. This post is part of the 48 Circuits or Less series. View more articles in this series here.
Meet the Author:

Hi, I’m Dominic. By day, I’m an engineer. By night, I repair and modify guitar effects! Since 2017, I’ve been independently modifying and repairing guitar effects and audio equipment under Mimmotronics Effects in Western New York. After coming out with a series of guitar effects development boards, I decided the next step is to support that community through content on what I’ve learned through the years. Writing about electronics gives me great joy, particularly because I love seeing what others do with the knowledge they gain about guitar effects and audio circuits. Feel free to reach out using the contact form!
The Tools I Use
As a member of Amazon Associates, Stompbox Electronics earns and is supported by qualifying purchases.


