
PROTIS 1™ BASIC Guitar Effects Development Board
The PROTIS 1™ BASIC is a the standard for Guitar Effects Development Boards, serving DIY pedal builders, studio engineers, synth circuit designers, and other audio enthusiasts!
What You’ll Get
- An organized electronics design experience
- Wiring is no hassle – everything you need is integrated on the board.
- Ability to handle both Mono and Stereo pedal designs.
- Customization of your experience through the module board interface.
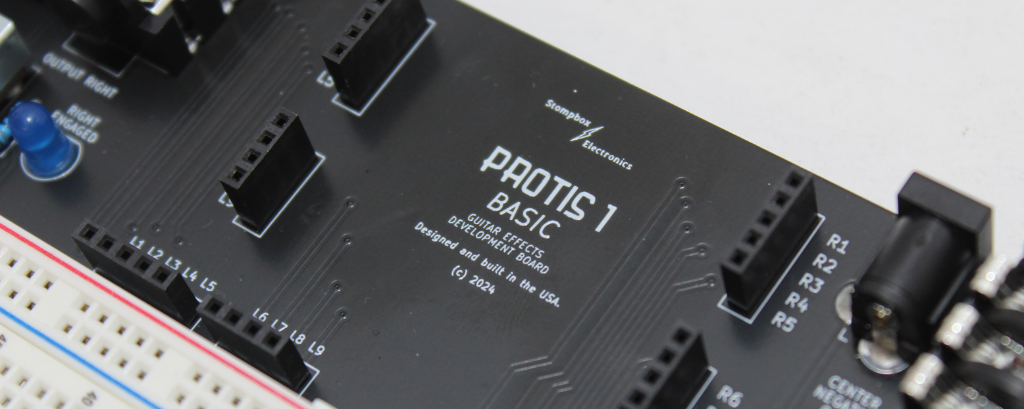
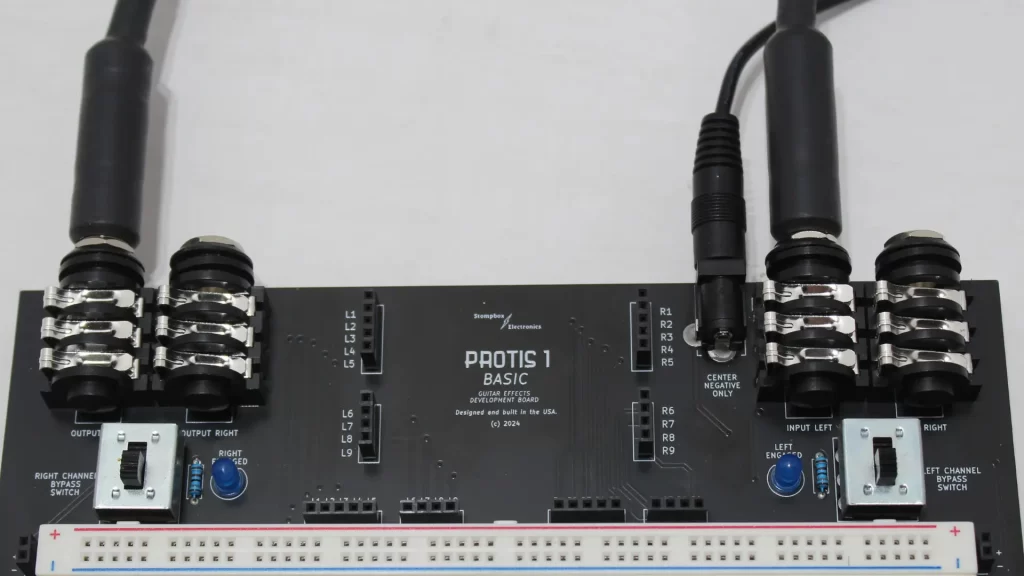
PROTIS 1™ BASIC Features
- 1,660-point breadboard
- Input and Output jacks for both regular mono and stereo guitar effects designs.
- Integrated power connector designed for negative-tip power supplies.
- True Bypass switching – individual slide switches for mono & stereo channels.
- Four (4) rubber feet to prop up the board from your bench.
- Modular Prototyping Board space for customizing your prototyping experience.
- [Add-On] Prototyping jumper wires
I. Powering Your PROTIS 1™ BASIC
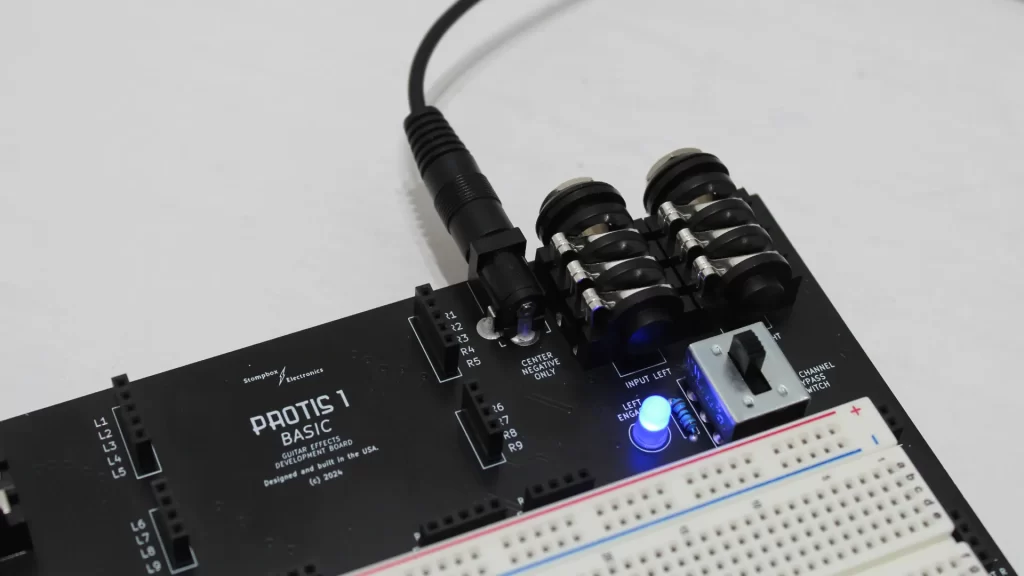
The PROTIS 1™ BASIC has an integrated connector for applying power from a center-negative polarity power adapter.
The BOSS PSA adapter is suggested for +9V power. I personally use a Voodoo Labs ISO 5, which has +9V, +12V, and +18V options. Though, you can use any standard power source with negative-center polarity (feel free to contact me if you’re unsure).
The connector barrel accepts 2.1mm-sized plugs.
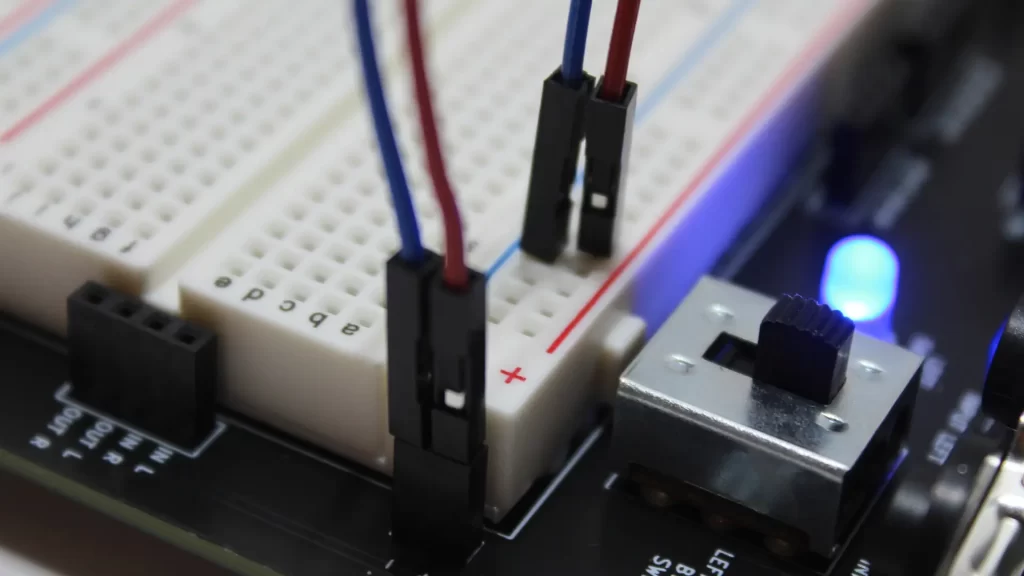
Powering the Breadboard
Power can be accessed through any of the six (6) 2-pin headers located along the side of the breadboard. It’s suggested that the (+) be connected to a RED bus on the breadboard and the (-) is connected to a BLUE bus, as shown below.
Jumper cables are available as an add-on for connecting to the power headers.
Recommended Power Supplies
Budget Options: BOSS PSA Series for +9VDC (Reverb) (suggested) | Tru-Tone One Spot for +9VDC (Reverb) | Gonine 18V Supply (Amazon) for +18VDC
Benchtop Options: Voodoo Labs ISO 5 (Reverb) | Mosky Power Station Nano (Reverb)
The benchtop options allows you to be able to connect multiple pedals to one unit, letting you easily test your design with other pedals in the same space.
II. Input and Output Signals
Signal flow on the PROTIS 1™ BASIC is identical to how it works in most pedals: from right to left.
For mono operation (1 input and 1 output), use the Input Left and Output Left jacks. To toggle the bypass, use the Left Channel Bypass Switch. To connect the input and output signals to your circuit on the breadboard, use any one of the four (4) input/output headers – specifically the points labeled IN L and OUT L.
For stereo operation (2 inputs and 2 outputs), use the same jacks and headers as above for the left channel. For the right channel, use the corresponding jacks (Input Right and Output Right) and the points labeled IN R and OUT R. To bypass the right channel, use the Right Channel Bypass Switch.
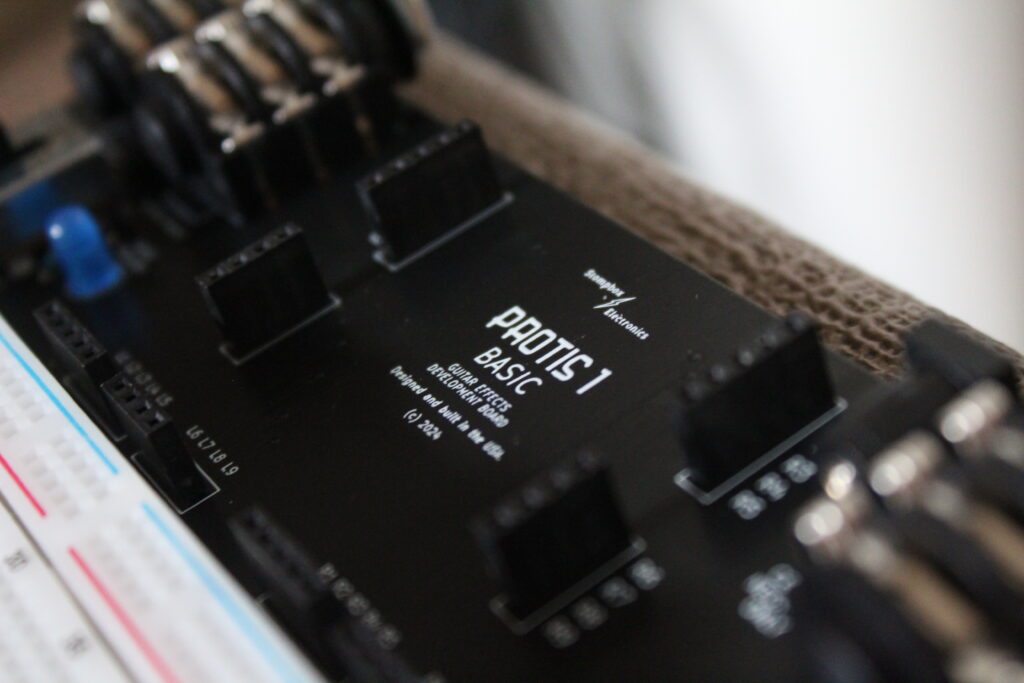
III. Modular Prototyping Boards
The PROTIS 1™ BASIC provides the ability to customize your prototyping experience with the Prototyping Board space!
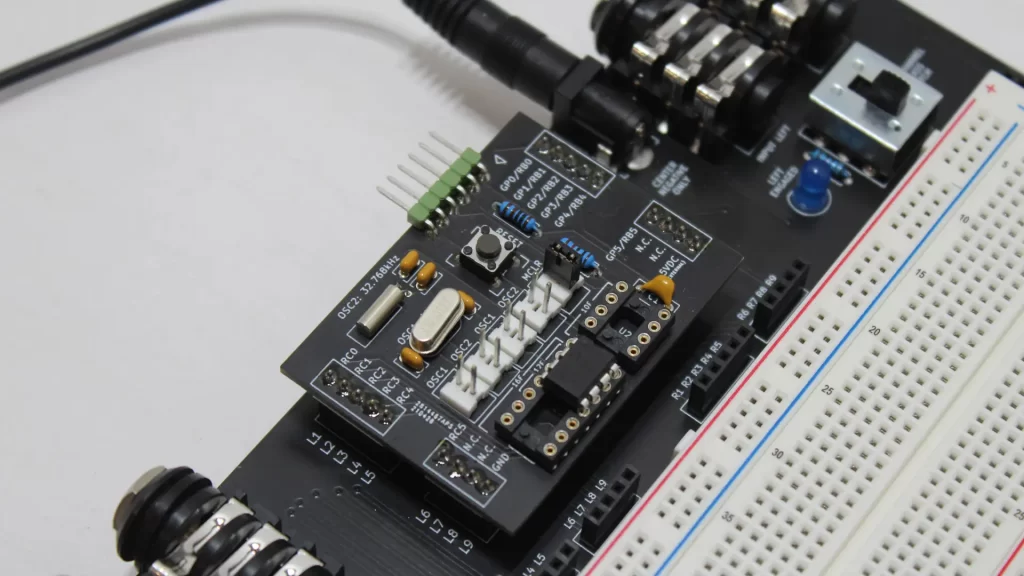
There are three (3) ways you can leverage the prototyping board space:
- Use Stompbox Electronics prototyping module boards like the Dual Jacks Module, Selector Module, Eurorack Module, and PIC Microcontroller Development Module
- Use third-party prototyping modules (not designed or verified by Stompbox Electronics).
- DIY your own prototyping modules using protoboard or custom-built circuit boards designed with PCB design software like KiCAD.
PROTIS 1™ Series Prototyping Modules
Each of the Stompbox Electronics module boards have special power requirements. Please don’t hesitate to contact me on what is required to operate the prototyping modules.
DIY Prototyping Modules
The layout for creating your own modules is available by special request. Generally, the holes are spaced a standard 2.54mm apart and a standard protoboard can be used to develop your own custom modules.