

With most DS-1 versions using through-hole components, and with the schematics widely available, the BOSS DS-1 has been a prime target for do-it-yourselfers seeking to squeeze out all the tonal goodness they can get.
One of the easiest mods you can perform on this classic distortion is the BOSS DS-1 Fat Mod, conceived and popularized by Jack Orman of amzfx/Muzique.
In this article I perform the BOSS DS-1 Fat Mod and explain what it does to the circuit. I even recorded some audio samples that you can check out near the end.

As a member of the Reverb Partner Program, eBay Partner Network, and as an Amazon Associate, StompboxElectronics earns from, and is supported by, qualifying purchases.
Disclaimer: Stompbox Electronics and/or the author of this article is/are not responsible for any mishaps that occur as a result of applying this content.
What is the BOSS DS-1 Fat Mod?
The BOSS DS-1 Fat Mod is a guitar pedal modification that was conceived and popularized by Jack Orman on his website muzique.com. The mod involves swapping just two resistors in the preamp section of the DS-1 circuit, just before the gain stage. Before we get into the details of the Fat Mod, let’s give some kudos to the originator Jack Orman himself.
Jack Orman: Conceiver of the Fat Mod
According to Orman, being wrist-deep in guitar pedals goes back all the way to the mid-70s when he built his first pedal:
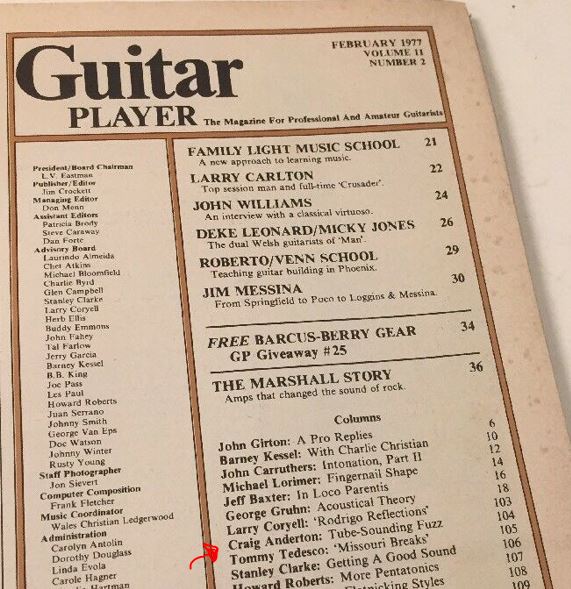
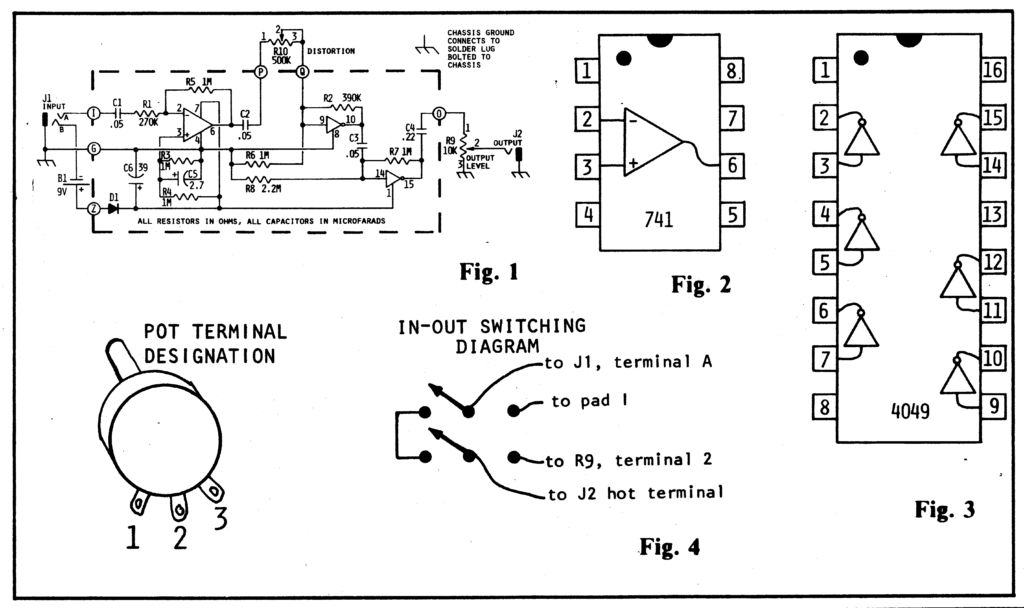
“… A Craig Anderton fuzz from Guitar Player magazine using a pc board that I made with a Sharpie pen and some Radio Shack copperclad.”
Up through the mid-80s Orman owned a music store, where he sold his own handmade stompboxes. In his own words, Orman was one of the earliest boutique pedal builders! From 1985 onwards Orman has written articles for dozens of outlets and magazines: Popular Electronics, Nuts-n-Volts, Electronic Musician, Videomaker, and Polyphony.
Since 1995, he has owned and operated his site AMZ, which is hosted at the domain http://www.muzique.com/. You can read more on Jack and his contributions on his website.
What does the Fat Mod do?
There are plenty of criticisms thrown at the BOSS DS-1’s stock tone. Just take a look at the responses on this Reddit post. By far, most complaints come from its “hairiness” when the Tone knob passes 1 or 2 o’clock.
That “hairiness” comes from the way the DS-1 was engineered. When your guitar signal enters the DS-1, it first encounters a buffer. Then, immediately after, a preamp stage boosts the signal before entering a gain stage. That preamp boost section contributes to a large amount of treble gain. That along with the amplification in the gain stage results in the “hairiness” encountered when the Tone knob is set past noon.
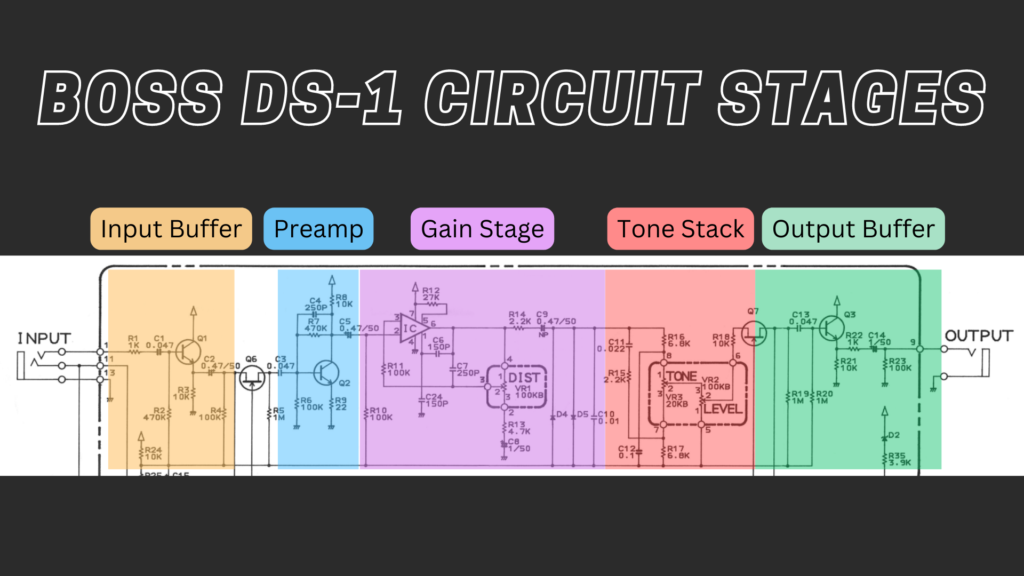
The Fat Mod seeks to reduce the hairy tone of the DS-1 by lowering the amount of boost created by the preamp stage. When the guitar signal enters the gain stage more of its character is preserved, thus fattening up the sound with low and middle frequency content. At the same time, high frequency content is reduced since there’s an overall reduction in gain.
Performing the BOSS DS-1 Fat Mod
Tools and Materials
The Fat Mod involves removing resistors and soldering new resistors in their place. The basic tools you will need are a soldering iron, a desoldering pump, and some precision tweezers.
Tools for Soldering
For soldering irons, I’ve personlly used two of the most popular choices: the Weller WE1010NA and the Hakko FX888D. I settled on the Weller, but they are both great options. Here’s a review comparing the two:

Tools for Desoldering and Removing Components
To remove solder, I use a technique that involves a desoldering pump and desoldering braid. If you don’t have any desoldering tools, you can find them easily on Amazon:


Another tool that I find useful: precision tweezers. I use these to apply upwards pressure on the resistor leads so that you can remove them effectively while heating the solder pad.


I also use a technique called reflowing that I will detail in the instructions below.
Parts Needed for the BOSS DS-1 Fat Mod
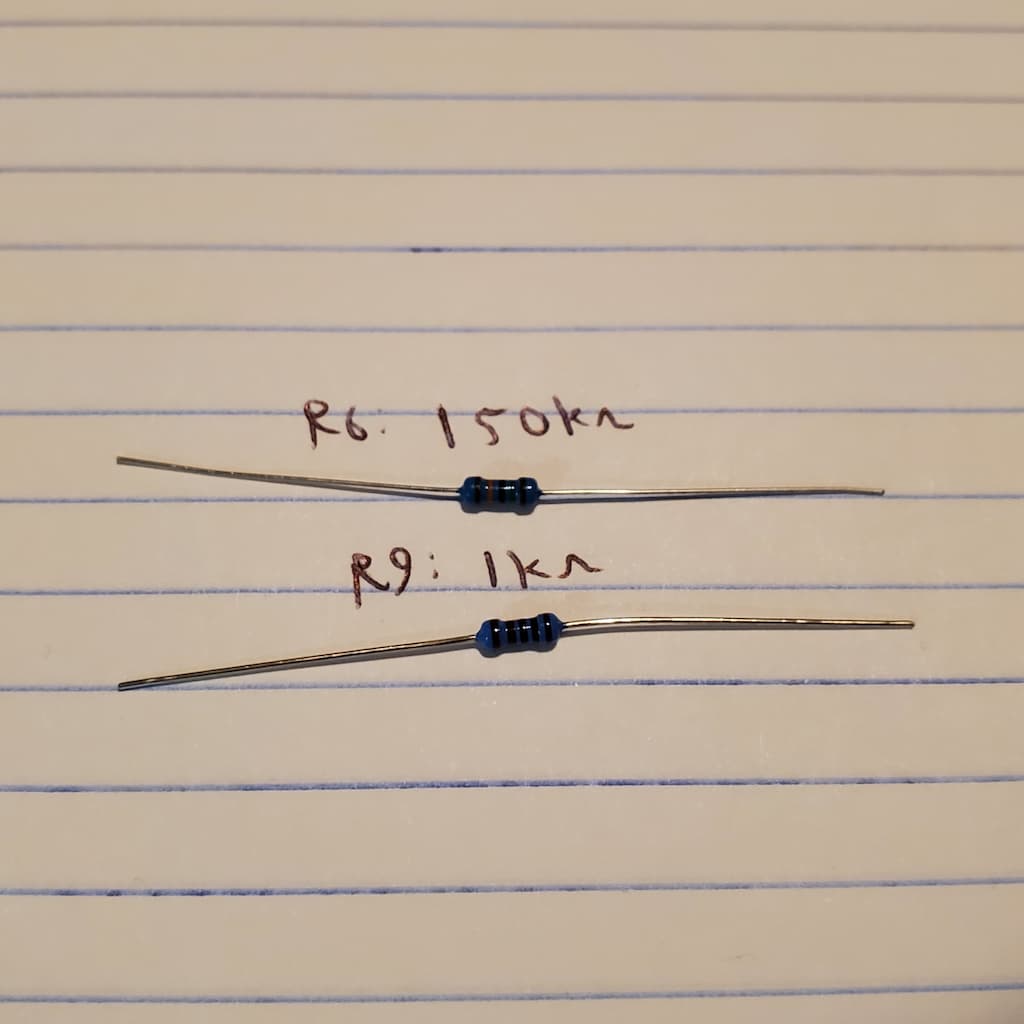
For the Fat Mod, you only need two parts: a 1k ohm resistor and a 150k ohm resistor.
| BOSS DS-1 Designation | Fat Mod Resistor Value |
|---|---|
| R6 | 150k |
| R9 | 1k |
BOSS DS-1 Fat Mod Instructions
This mod is verified on all versions of the DS-1 except for the newer versions with surface-mount parts. Open the DS-1 by unscrewing the four screws on the back, then follow the steps below to complete the mod.
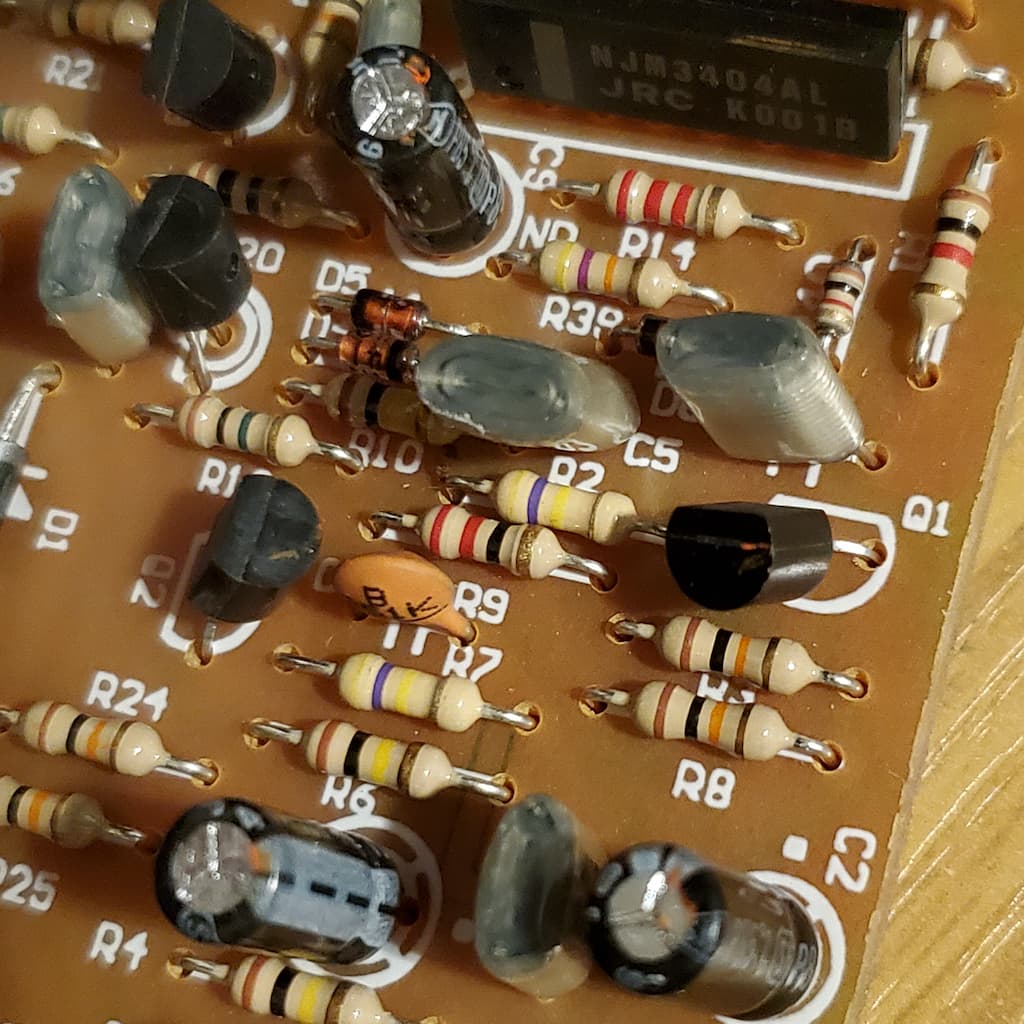
1. Locate R6 and R9
The first step is to locate resistors R6 and R9. All the resistors are labeled on the circuit board, as shown, so it should be easy to locate them. Here’s what mine looks like:
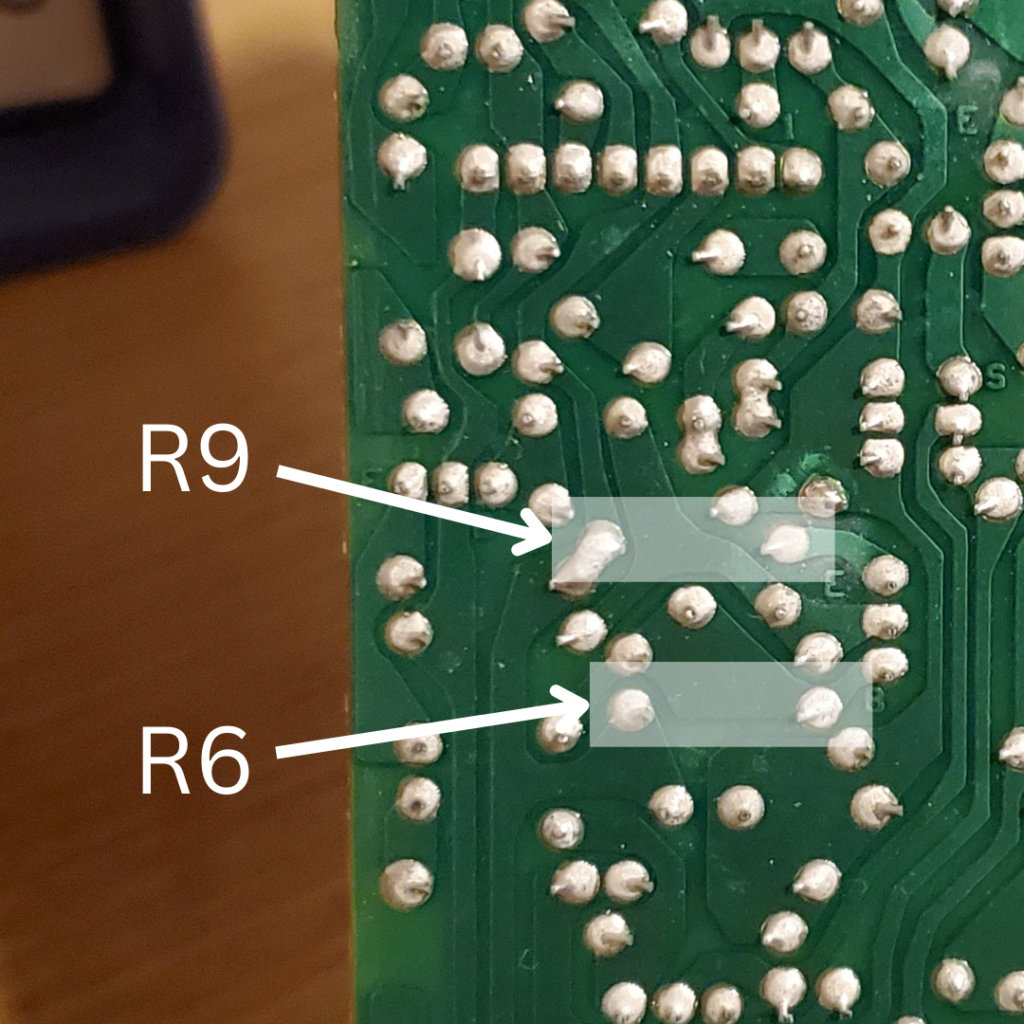
We’ll need to desolder R6 and R9 from the board, so it’s perhaps more important to know where they are on the trace-side. For my DS-1, here is their location from the back:
2. Stage the parts
The Fat Mod swaps R6 for 150k ohms and R9 for 1k ohms. Make sure you have both parts ready for the rest of the mod!
3. Reflow the solder on R6 and R9
Reflow the existing solder points of R6 and R9.
What is “reflowing” you ask?
To reflow means to melt the new solder onto a connection point that’s already soldered. This is done so that the flux in the new solder will mix with the existing solder, allowing it to melt more readily when we desolder it in the next step.
4. Desolder R6 and R9
Now you can start desoldering the stock resistors. First prepare your desoldering pump. Then, use your soldering iron to heat up the connection point long enough for the solder to visibly melt. When you see the solder liquify, quickly move the pump over the connection point and press the release to suck up the solder.
Don’t worry if you can’t get all the solder off. If you’re having trouble you use the precision tweezers to apply upward pressure on the resistor leads while heating up the connection point. Just make sure that the solder vias are clear of any solder after removing the resistors so you can slide the new ones in.
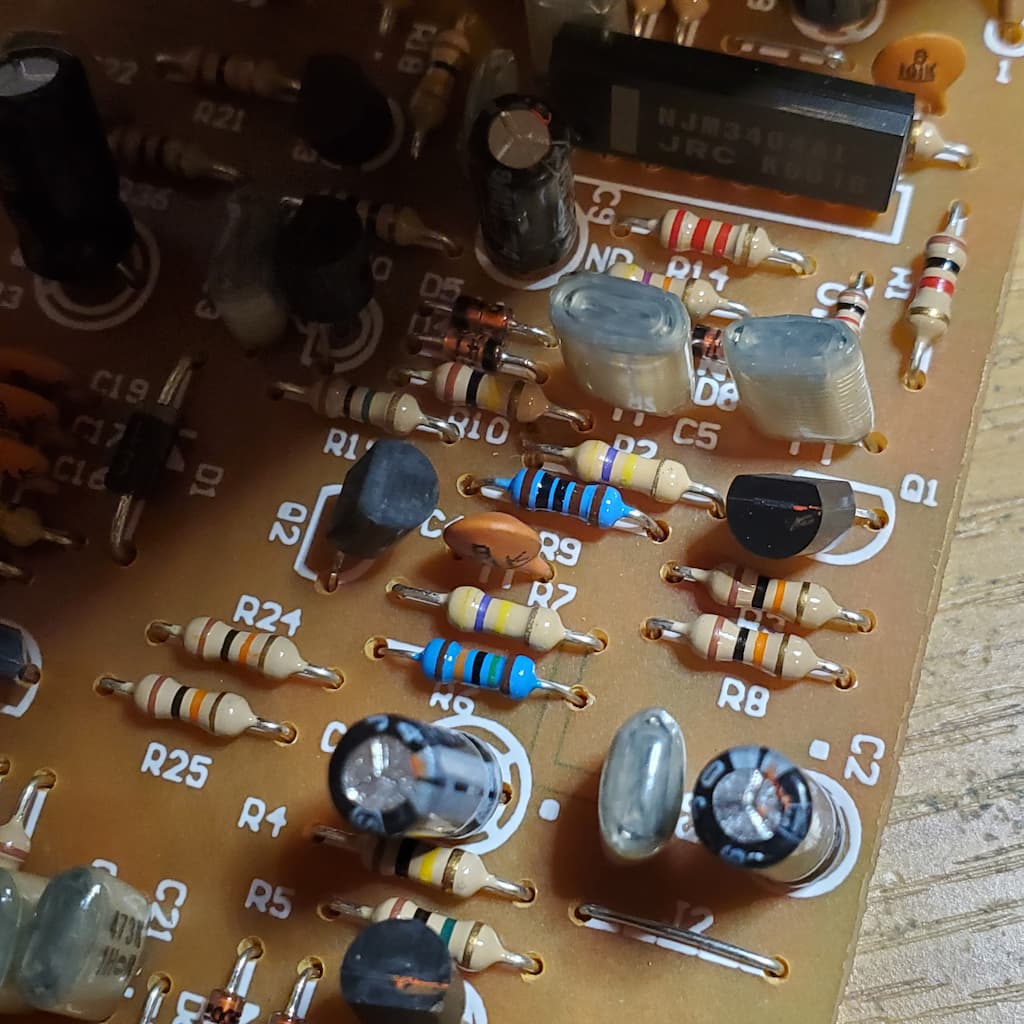
5. Install the new resistors
The next, and final, step is to install the new resistors.
Remember R6 is 150k, with one of its ends connected to the base of Q2. R9 is 1k, with one of its ends connected to the emitter of Q2.
BOSS DS-1 Fat Mod Audio Samples
Stock vs. Fat Mod #1: “Steve Vai Settings”
For the first set of audio samples I just used Steve Vai’s recommendation from his interview with Musician’s Friend, found below. It involves rolling back the Tone knob and cranking the Distortion knob for a thicker, tighter sound.
- Tone: 10 o’clock
- Level: 12 o’clock
- Distortion: 5 o’clock
Stock vs. Fat Mod #2: Rolling Back Distortion
On these next tracks, I rolled back the Distortion from where I had set it for the Steve Vai settings. In my opinion, for these settings, the Fat Mod really “fattened out” the areas that the stock circuit was lacking.
- Tone: 10 o’clock
- Level: 12 o’clock
- Distortion: 2 o’clock
Stock vs. Fat Mod #3: Brightened Tone, Distortion Dimed
Since one of the popular criticisms of the DS-1 is how harsh it is, I wanted to see how this mod compares with the Tone jacked up a bit. Here’s the stock vs. rock comparison with the Tone at 2 o’clock and the distortion max’d.
- Tone: 2 o’clock
- Level: 12 o’clock
- Distortion: 5 o’clock
Meet the Author:

Hi, I’m Dominic. By day, I’m an engineer. By night, I repair and modify guitar effects! Since 2017, I’ve been independently modifying and repairing guitar effects and audio equipment under Mimmotronics Effects in Western New York. After coming out with a series of guitar effects development boards, I decided the next step is to support that community through content on what I’ve learned through the years. Writing about electronics gives me great joy, particularly because I love seeing what others do with the knowledge they gain about guitar effects and audio circuits. Feel free to reach out using the contact form!
As a member of the Reverb Partner Program and as an Amazon Associate, StompboxElectronics earns from qualifying purchases.
The Tools I Use
As a member of Amazon Associates, Stompbox Electronics earns and is supported by qualifying purchases.


