
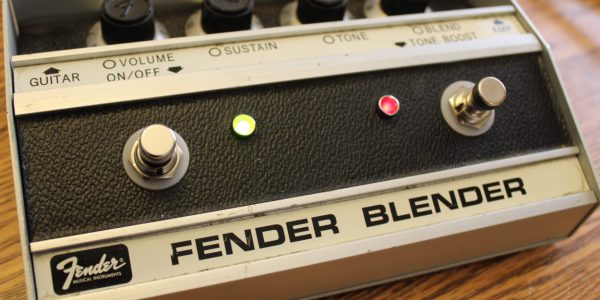
The Fender Blender is one of those pedals that you just gotta drool over! It’s such a unique octafuzz. The Blend knob makes it incredibly versatile. It’s definitely one to consider cloning in the near future..possibly installed in a Furby enclosure…
But today, we’re focusing on a minor addition to the Fender Blender: installing indicator LEDs for the bypass and tone boost controls. Not only that but there is a sort of pressure point next to the bypass switch that, when pressed, considerably changes the tone.

As a member of the Reverb Partner Program, eBay Partner Network, and as an Amazon Associate, StompboxElectronics earns from, and is supported by, qualifying purchases.
Disclaimer: Stompbox Electronics and/or the author of this article is/are not responsible for any mishaps that occur as a result of applying this content.
Fender Blender Repair
Let’s address this pressure point first. The pedal is held together by three screws. Upon opening and inspecting it I noticed two things right away. The first was a slightly loose white wire connected to the Tone Boost switch. This wasn’t the source of the pressure point problem but would be an issue at some point in the future, so I soldered that back in.
The second was a lead from capacitor C15 which extended long enough to make contact with the chassis.
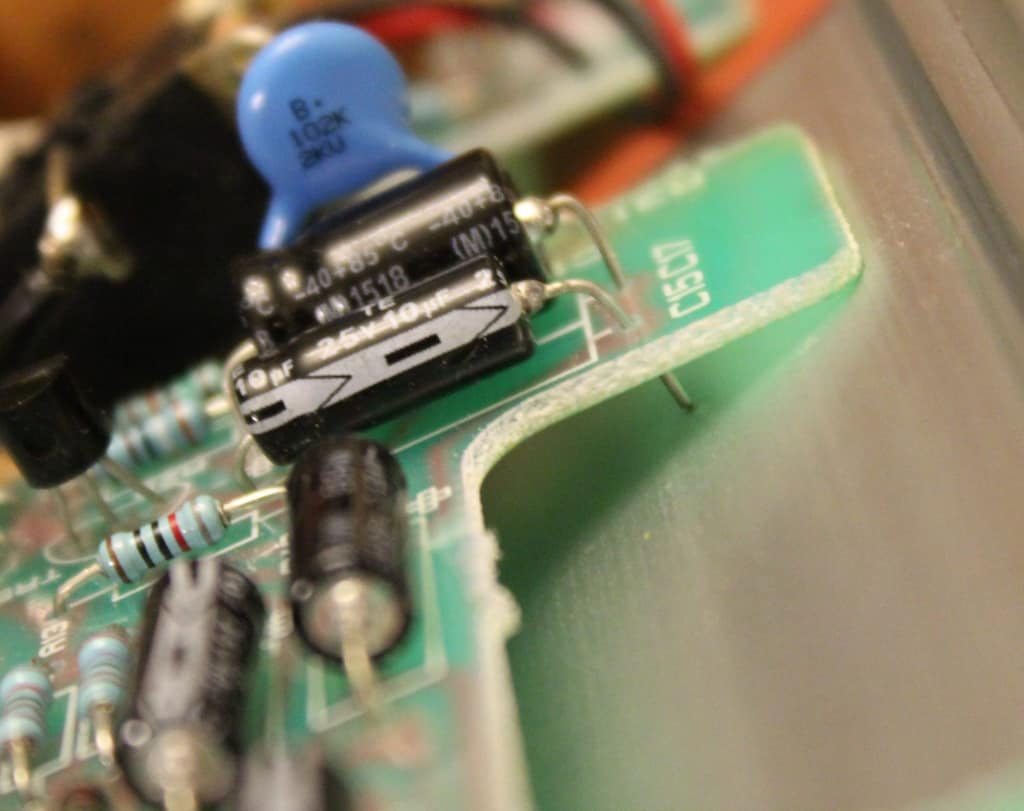
After this lead was cut the pressure point was relieved!
Fender Blender Indicator Mod
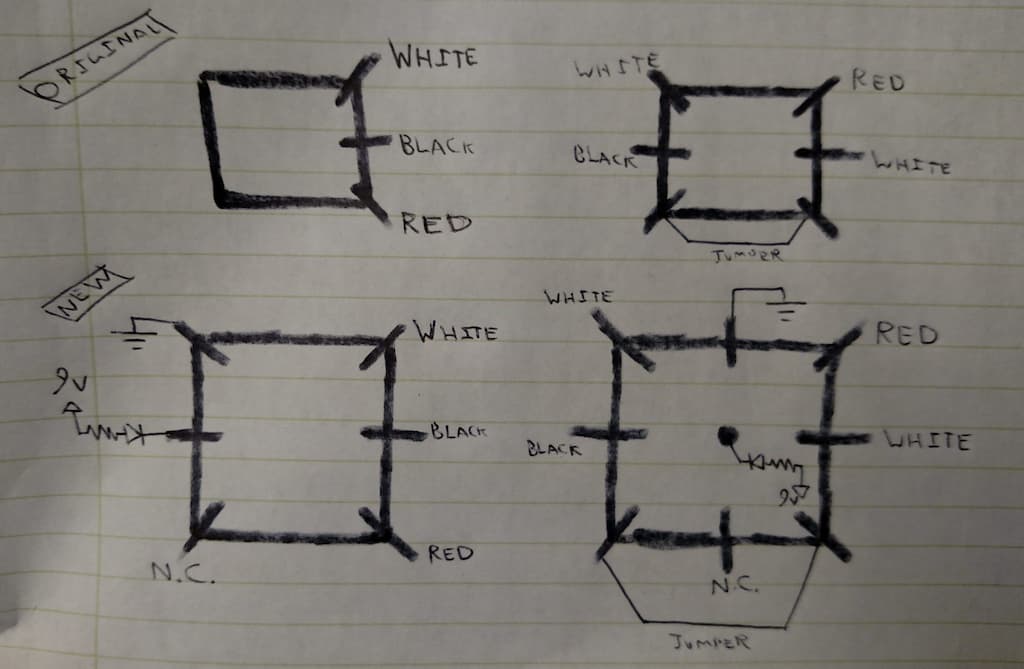
Next step: install the two LEDs for bypass and tone boost controls. The installation required swapping the Fender Blender’s stock switches with two 3PDT footswitches. The connections remained the same with the exception of adding some wiring for the LEDs.
Indicator Mod Parts List
You can perform this mod on your Fender Blender too, here are the parts used:
| Part | Qty | Recommended Sources |
|---|---|---|
| 3PDT Switch | 2 | LMS | Amazon |
| 5mm Red LED | 1 | Amazon |
| 5mm Green LED | 1 | Amazon |
| 5mm LED Chrome Bezel | 2 | LMS | Amazon |
| Hook-up Wire | To Taste | Amazon |
| 2.2k Ohm Resistors | 2 | Amazon |
| Vero-Board | 1 | Amazon |


Indicator Mod Tools
The following tools are required for completing the Indicator Mod for the Fender Blender:
| Tool | Recommended Sources |
|---|---|
| Soldering Station | Weller WE1010A (Amazon) |
| Solder | Kester Solder 24-6040-0027 (Amazon) |
| Solder Fume Extractor (Safety First!) | Hakko FA400-04 (Amazon) |
| Drill Press | Central Machinery Drill Press (Amazon) |
| 5/16″ Drill Bit (for the 5mm Chrome Bezels) | Drill Bit Set (Amazon) |
| Exacto Knife (for cleaning the material from the drill holes) | Elmer’s X-Acto (Amazon) |
| Deburring Tool (for cleaning the drill holes) | General Deburring Tool (Amazon) |
| Wire snippers | IRWIN Wire Cutters (Amazon) |
| Wire strippers | IRWIN Wire Strippers (Amazon) |
| Tweezers (for guiding the wires more easily) | Precision Tweezer Set (Amazon) |


Indicator Mod Description
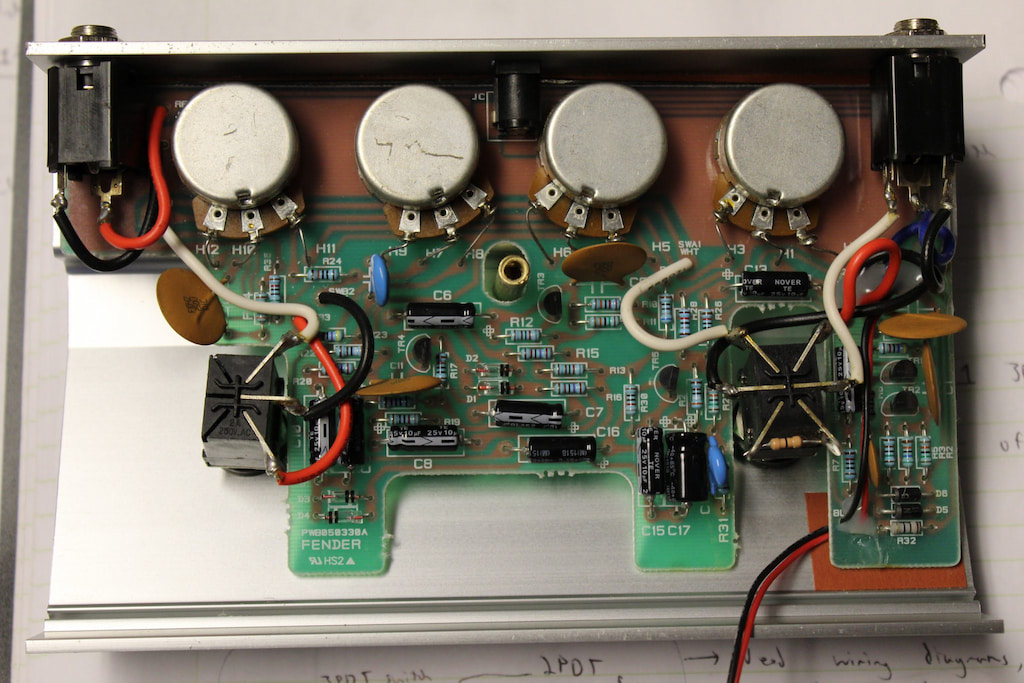
The power for both LEDs connected to the 9V rail found at the forward-bias end (cathode) of the D5 and D6 diodes. You can find them in the bottom right of the gut shot picture below. For the ground connection, I usually use the ground lug on either the input or output connectors.
After the power was routed for both LEDs, they had to be connected to their respective switches. The footswitches toggled in and out the cathode end of the diodes. If the Bypass switch was engaged, then the green LED would light. If the Tone Boost switch was engaged, the red LED would light. See the back-of-the-napkin wiring scheme below for details:
To successfully complete the mod, you just need to clip off the old wires, strip them back, and solder them to the new 3PDT switches. You can choose to desolder the wires from the old switches one-by-one, or you clip them close to the lugs so you have the slack.
Some of the existing wires may not be long enough to strip back, so you may need to remove some of them in the process (hence the hook-up wire in the Tools table above).
That’s about it!
Meet the Author:

Hi, I’m Dominic. By day, I’m an engineer. By night, I repair and modify guitar effects! Since 2017, I’ve been independently modifying and repairing guitar effects and audio equipment under Mimmotronics Effects in Western New York. After coming out with a series of guitar effects development boards, I decided the next step is to support that community through content on what I’ve learned through the years. Writing about electronics gives me great joy, particularly because I love seeing what others do with the knowledge they gain about guitar effects and audio circuits. Feel free to reach out using the contact form!
Spotlight
This Fender Blender repair and mod was done for Buffalo indie rock band Feverbox! Seek out their self-titled EP, released April 28th, 2017:
The Tools I Use
As a member of Amazon Associates, Stompbox Electronics earns and is supported by qualifying purchases.


